
The Search For Muons above 33,000ft.
Jeremy B. Cope
Perkins Park
December 3, 2018
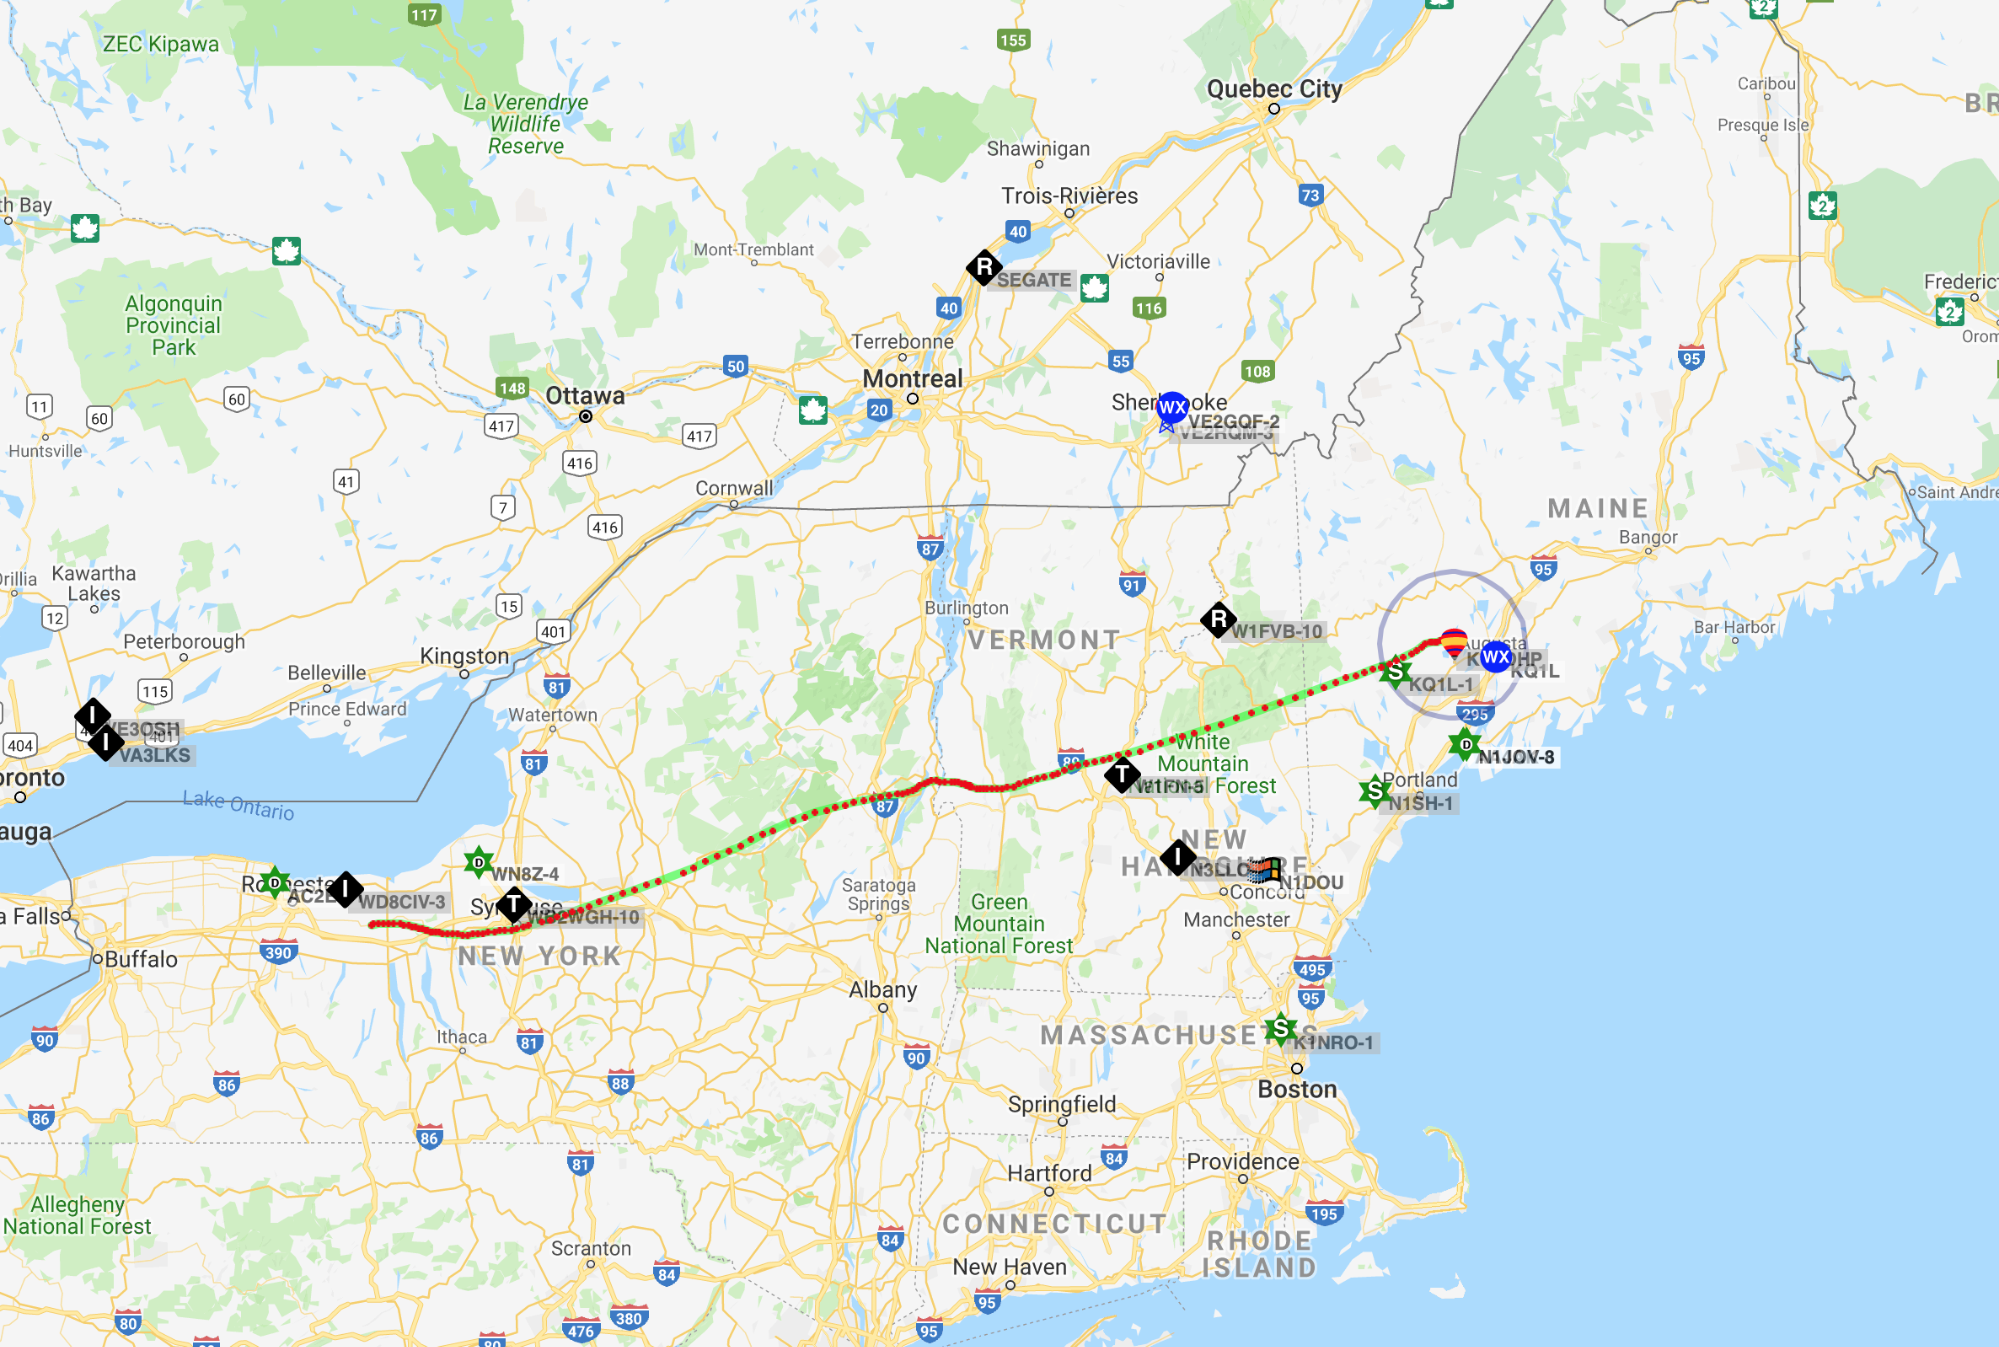
Newark, New York -> Wayne, Maine
Max Altitude: 62,703 ft.
Total Time: 5 hours 20 minutes
Total Distance: 364 miles

Introduction
In December 2018, my brother Jason and I launched our 3rd High Altitude Balloon (HAB). Along with the various cameras and sensors we typically place in our payload, this time our HAB contained a unique scientific experiment- a pair of particle detectors designed to capture cosmic muons that bombard our planet on a regular basis.

Background Motivation
First and foremost, adequate credit must be given to Spencer N. Axaniand and his team for putting together such a thorough description of creating a Desktop Muon Detector, named as the CosmicWatch. Without the extensive documentation and thorough scientific explanation, none of this would have been possible.
CosmicWatch: http://cosmicwatch.lns.mit.edu
Motivation for this scientific endeavor stems from simple curiosity and a sense of adventure. Having already launched and captured two High Altitude Weather balloons (one that reached over 105,000ft), the next iterative step was to include more equipment in the payload. After finding the CosmicWatch on HackADay, and learning a particle detector could be build for about $100, the choice was clear, I had to send a muon detector up into space.
Previous HAB Writeup: Cope Brothers High Altitude Balloon [PDF]
HACKADAY: Dirt Cheap Muon Detector Puts Particle Physics Within DIY Reach
My curiosity also extends deep into particle physics and number theory. Having a solid background in computer engineering, I was uniquely able to build this embedded scientific device. Assembling the CosmicWatch afforded me the opportunity to grow educationally and learn more about the scientific classification known as cosmic rays.
Across the universe, cosmic rays are particles swirling by from every direction. Some are produced by objects similar to our sun, a la photons (light) or gamma rays, while others are scattered by much more chaotic events like a supernova explosion or the collision of two black holes. These particles, however small, have enough energy to rip apart atoms upon collision. Fortunately, most of these cosmic rays hit particles in the atmosphere spreading showers of lower energy particles. The aurora borealis is a visual example of the effects of these particles bombarding into the atmosphere.
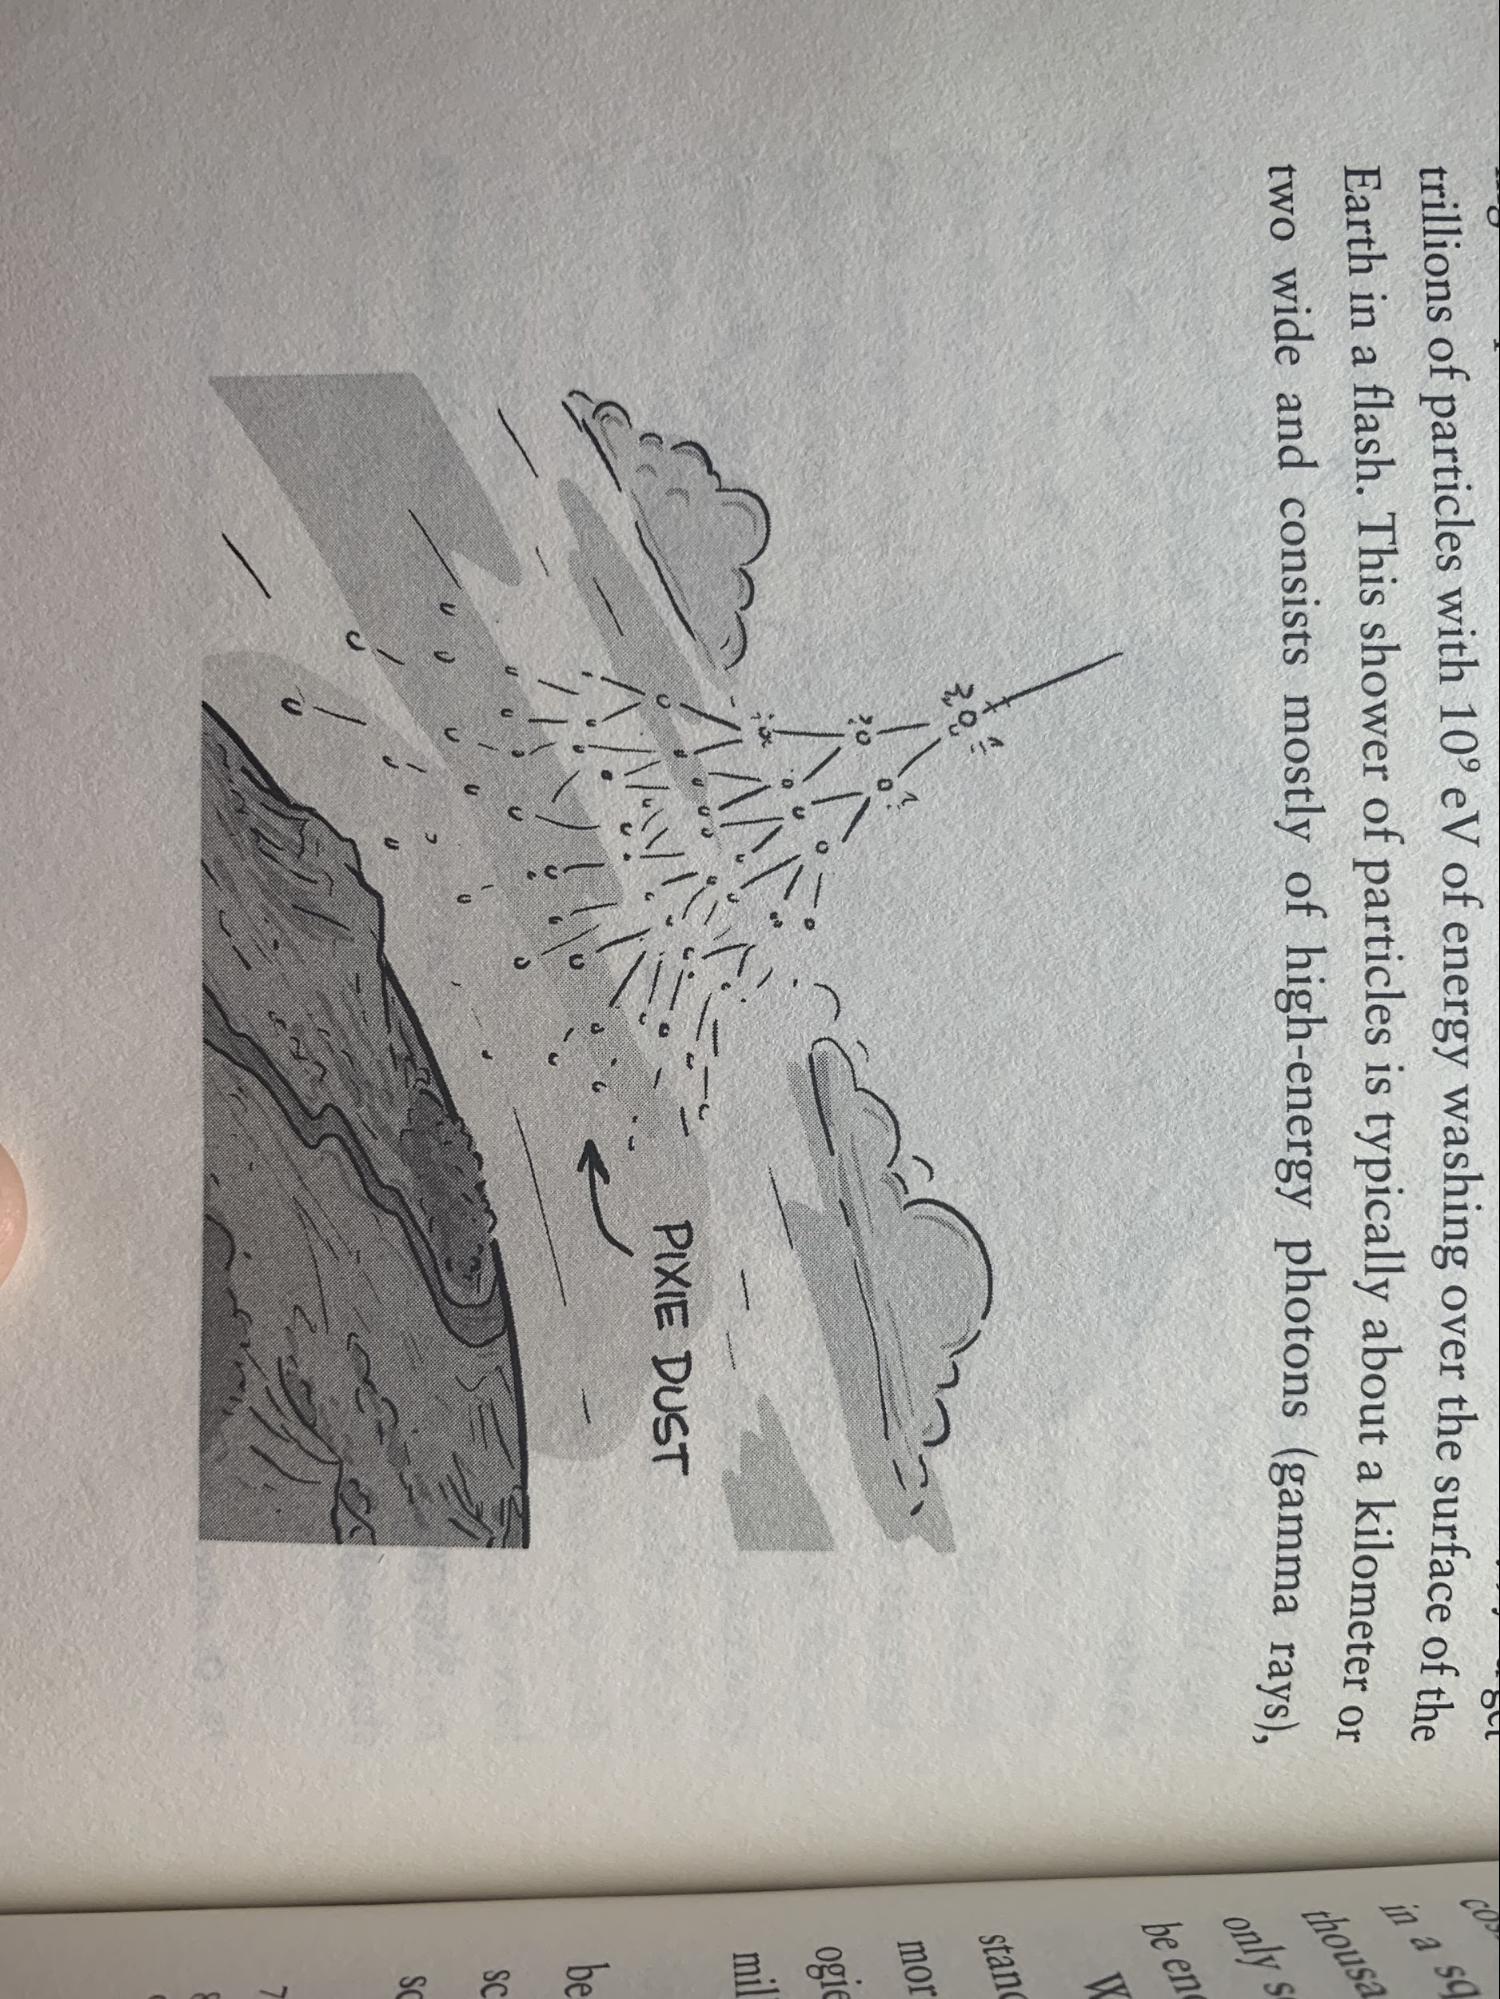
Credit To 'We Have No Idea' pg 194, a must read by Jorge Cham & Daniel Whiteson.
One of these by-products of these high-energy collisions happens to be a particle called a muon. First categorized in 1936 by Carl D. Anderson and Seth Neddermeyer at Caltech, it can be thought of on the same scale as an electron (electricity) or photon (light), but because it is 207 times heavier than the electron, it interacts very weakly with other particles and therefore tends to go through objects without incident.
However, using a uniquely composed piece of plastic called a scintillator, we can capture these muon particles and convert them into light (photons). A device called a photo-multiplier then amplifies these photons so that they can be converted into an electrical signal that can be measured. This is the CosmicWatch, an embedded muon detector containing a scintillator, photo-multiplier, and well designed electronics.
The Build
Having already launched two High Altitude Balloons, the extent of this project and subsequent build consisted of two phases. First, building a pair of CosmicWatch muon detectors, and second the installing and modifying of our original payload.
CosmicWatch
The best way to learn how to build your own CosmicWatch is to view the project on GitHub at https://github.com/spenceraxani/CosmicWatch-Desktop-Muon-Detector-v2. There you can follow detailed build instructions, order parts from a bill of materials, and assemble the device using instructional videos. Therefore, I will try to stick to describing my personal experience putting together the muon detectors and any helpful hints I may have come across as I assembled the devices.
In order for the experiment to be a success, it requires two muon detectors in order to set them up in coincidence mode. By connecting the devices together, we can trigger detection as long as both devices are triggered within 0.3 us (microseconds). And following logic from the movie Contact, I decided to build three detectors, in the hope that at least two would work. There is also a pricing discount when purchasing some components in volume, so it made sense to have an inventory.
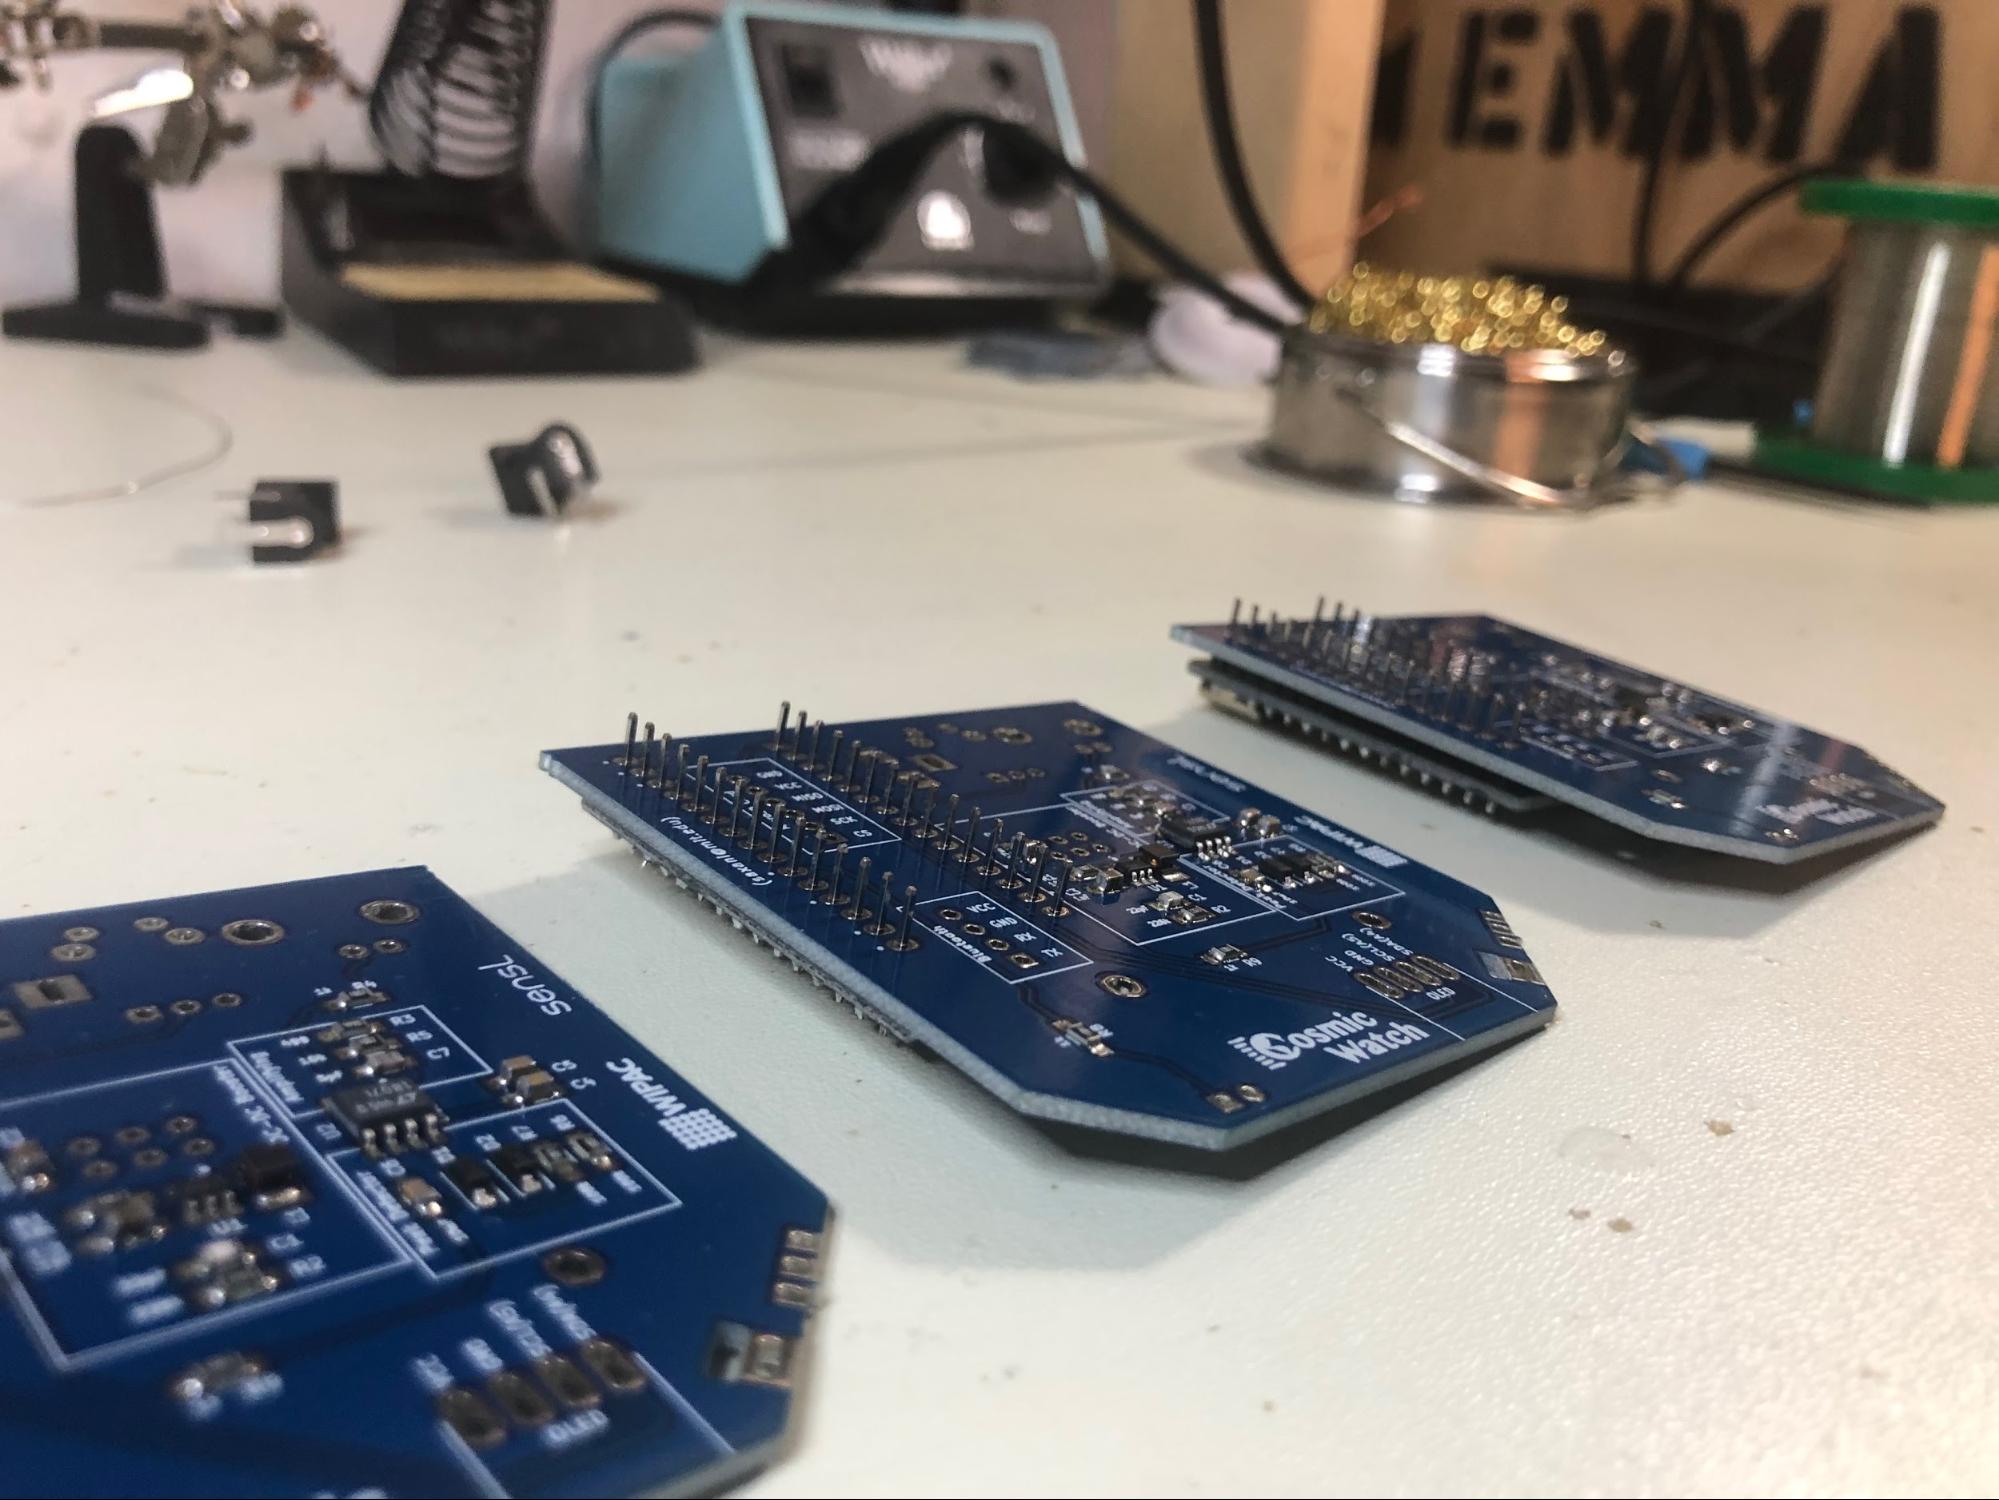
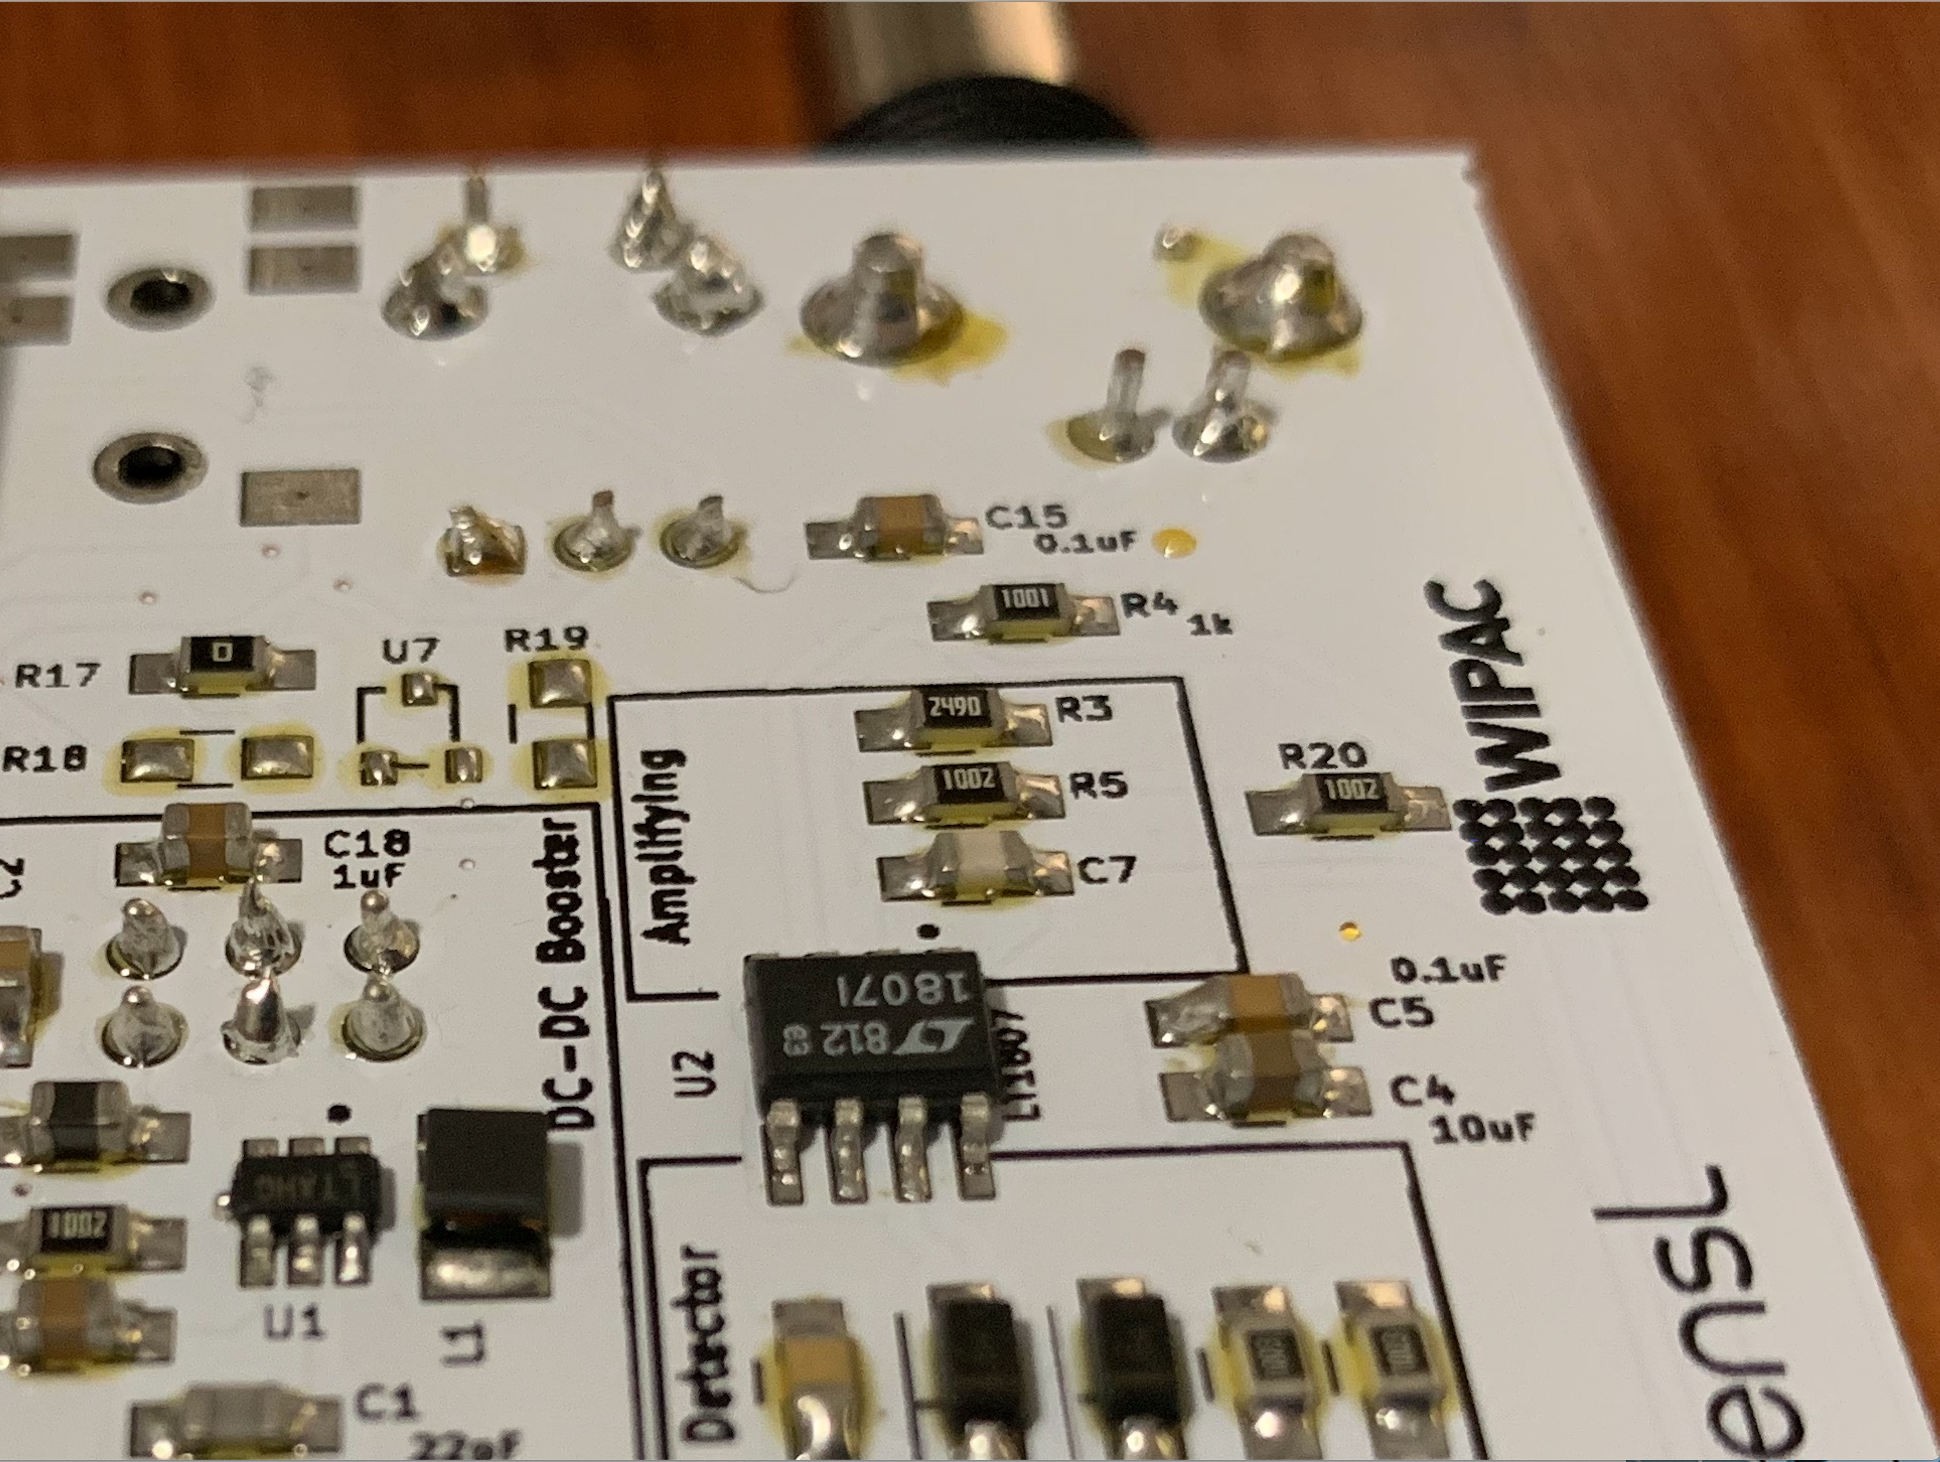
The device calls for 8050 size components, which if you aren’t familiar with SMD components, means they are 0.08 in × 0.05 in (2.0 mm × 1.25 mm)- very tiny parts. Each one has to be mechanically connected to the board to make an electrical connection between two metal pads. In some cases, solder and a soldering iron will do the trick, but with parts this small, I opted for a reflow oven.
When I purchased the PCBs (printed circuit boards), I also opted for a metal stencil so I could apply a thin solder paste to each pad. From there it is simply a matter of meticulously placing the components in the right place using electrostatic tweezers. Once populated, the boards go into a reflow oven to bake the components following a specific temperature waveform. This allows the solder paste to melt into a liquid and then cool back into a solid, forming an electro/mechanical connection between the components and the board.
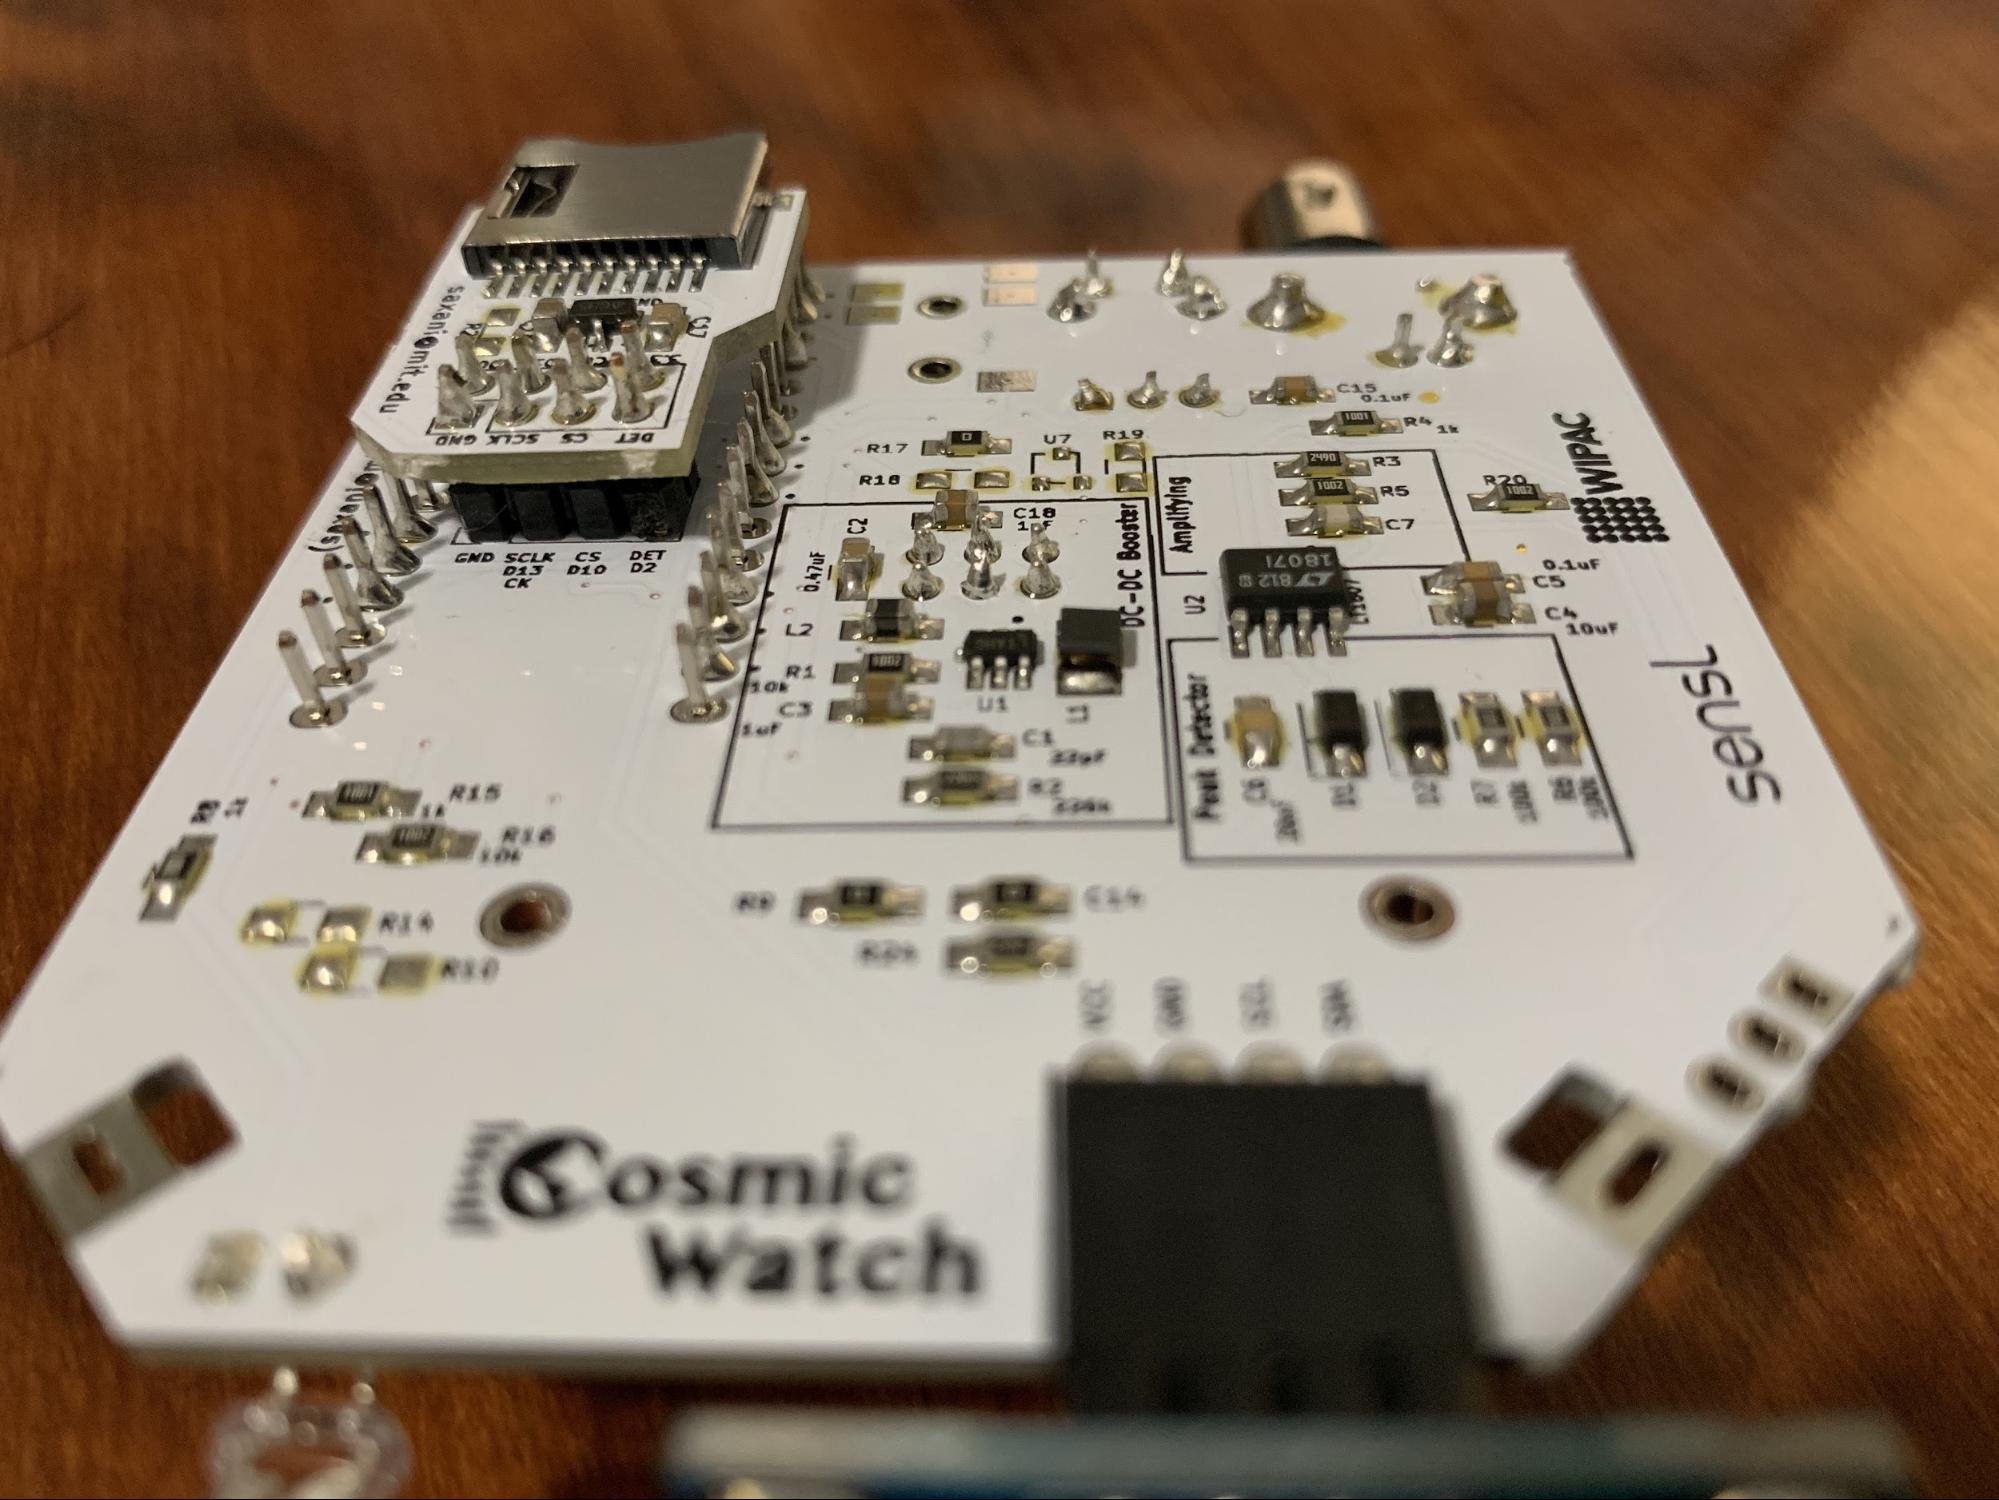
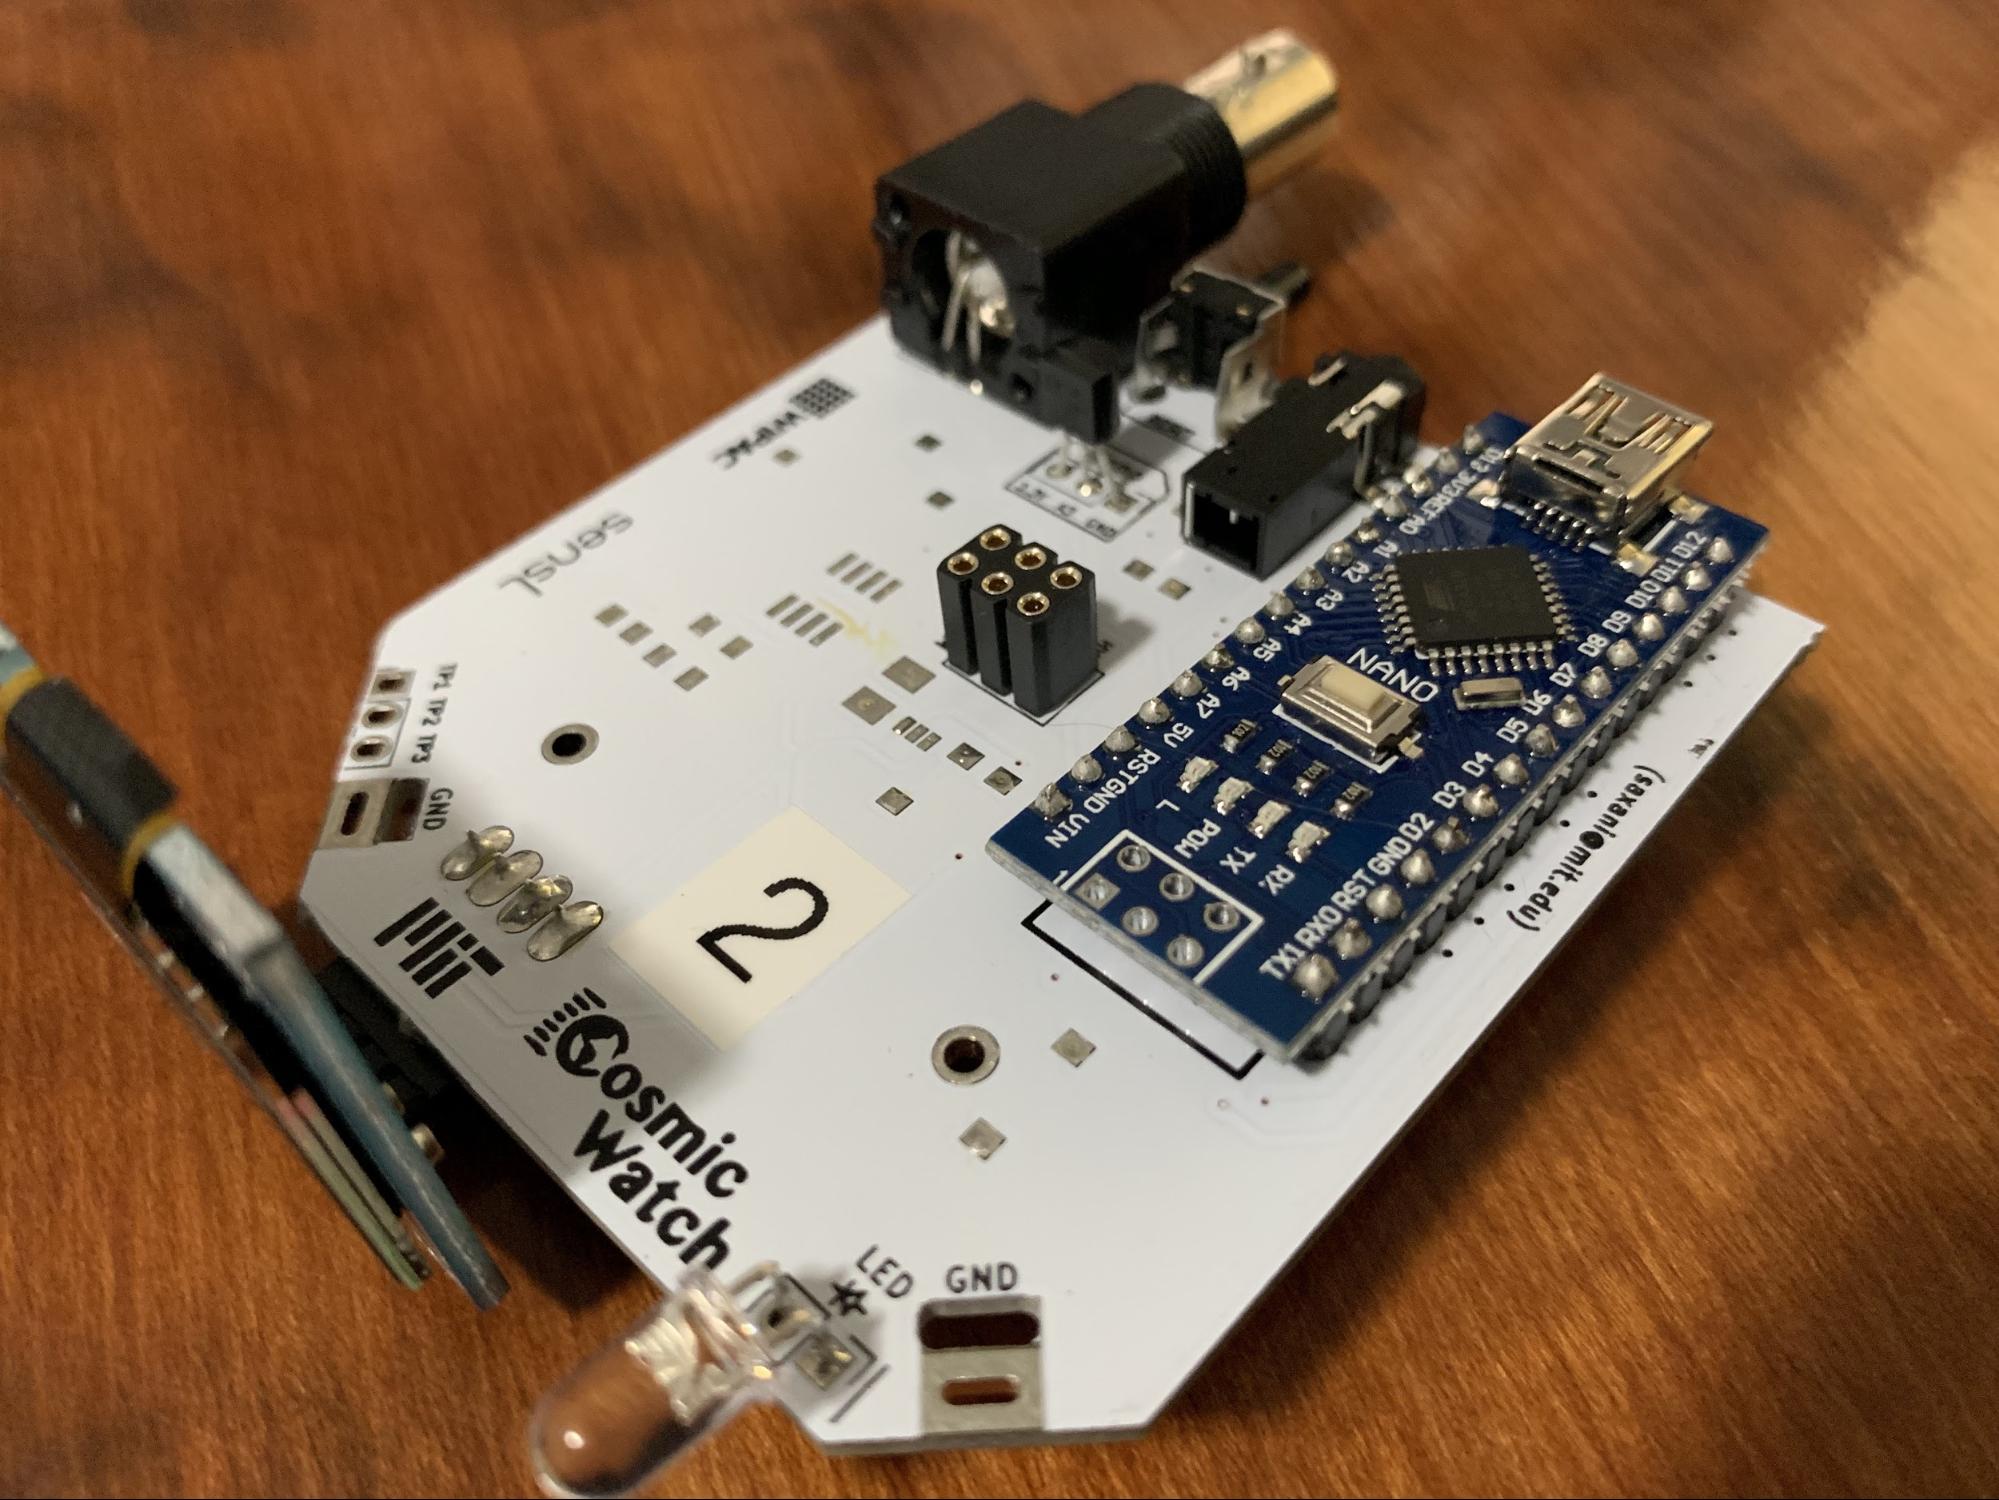
Once the boards are complete, it is time to solder the rest of the connections and components to the board. These parts use pin headers, so there is much more room to work with when soldering the connections by hand. The placement of the SDCard connections in between the Arduino Nano pins is a nice design that I had not seen before.
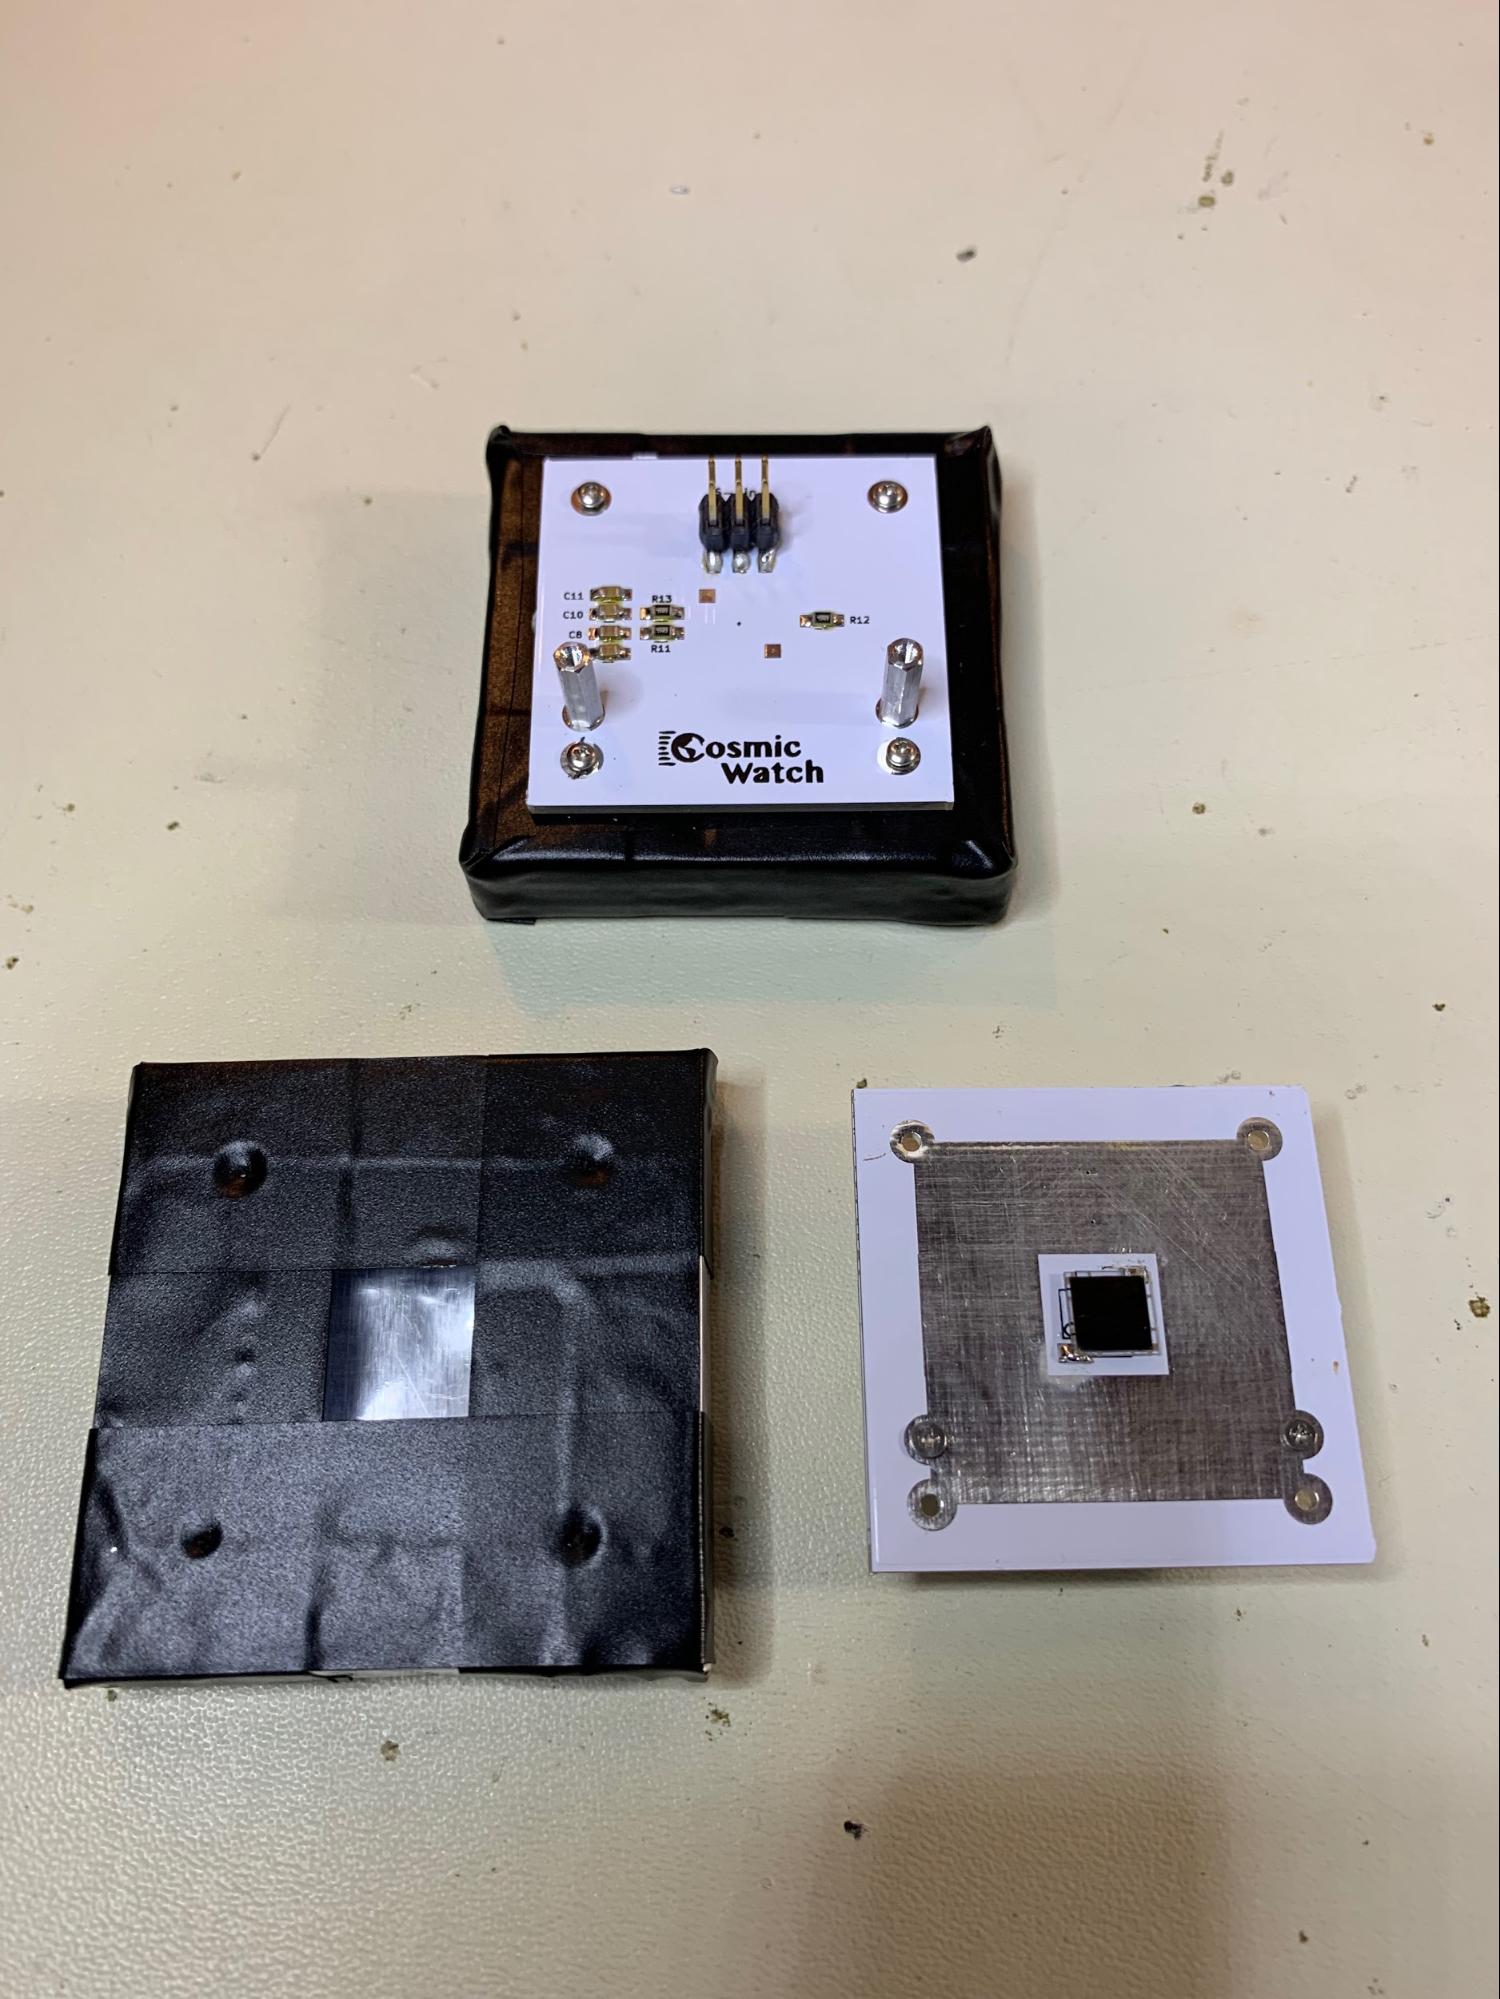
Now it is time to assemble the scintillator and photomultiplier into the SiPM module. I was able to buy a plastic scintillator and optical gel on eBay, as these were the most unique items on the bill of materials. Everything else was found using the suppliers listed in the instructional tutorial, although some of the components were out of stock and I had to research suitable replacements.
eBay Store: https://www.ebay.com/usr/iradinc
It wasn’t the easiest lining up the holes on the circuit board in order to drill the plastic scintillator. I found my drill bit ended up melting some of the plastic as it went through, but none of the holes ended up cracking. Next I wrapped the scintillator in heavy duty tinfoil, leaving a window for the photomultiplier to catch those photons as they bounce around. I then screwed the electronic board with the photo-multiplier to the scintillator and wrapped everything together in black electrical tape. Repeat two other times and the SiPM modules are now complete.
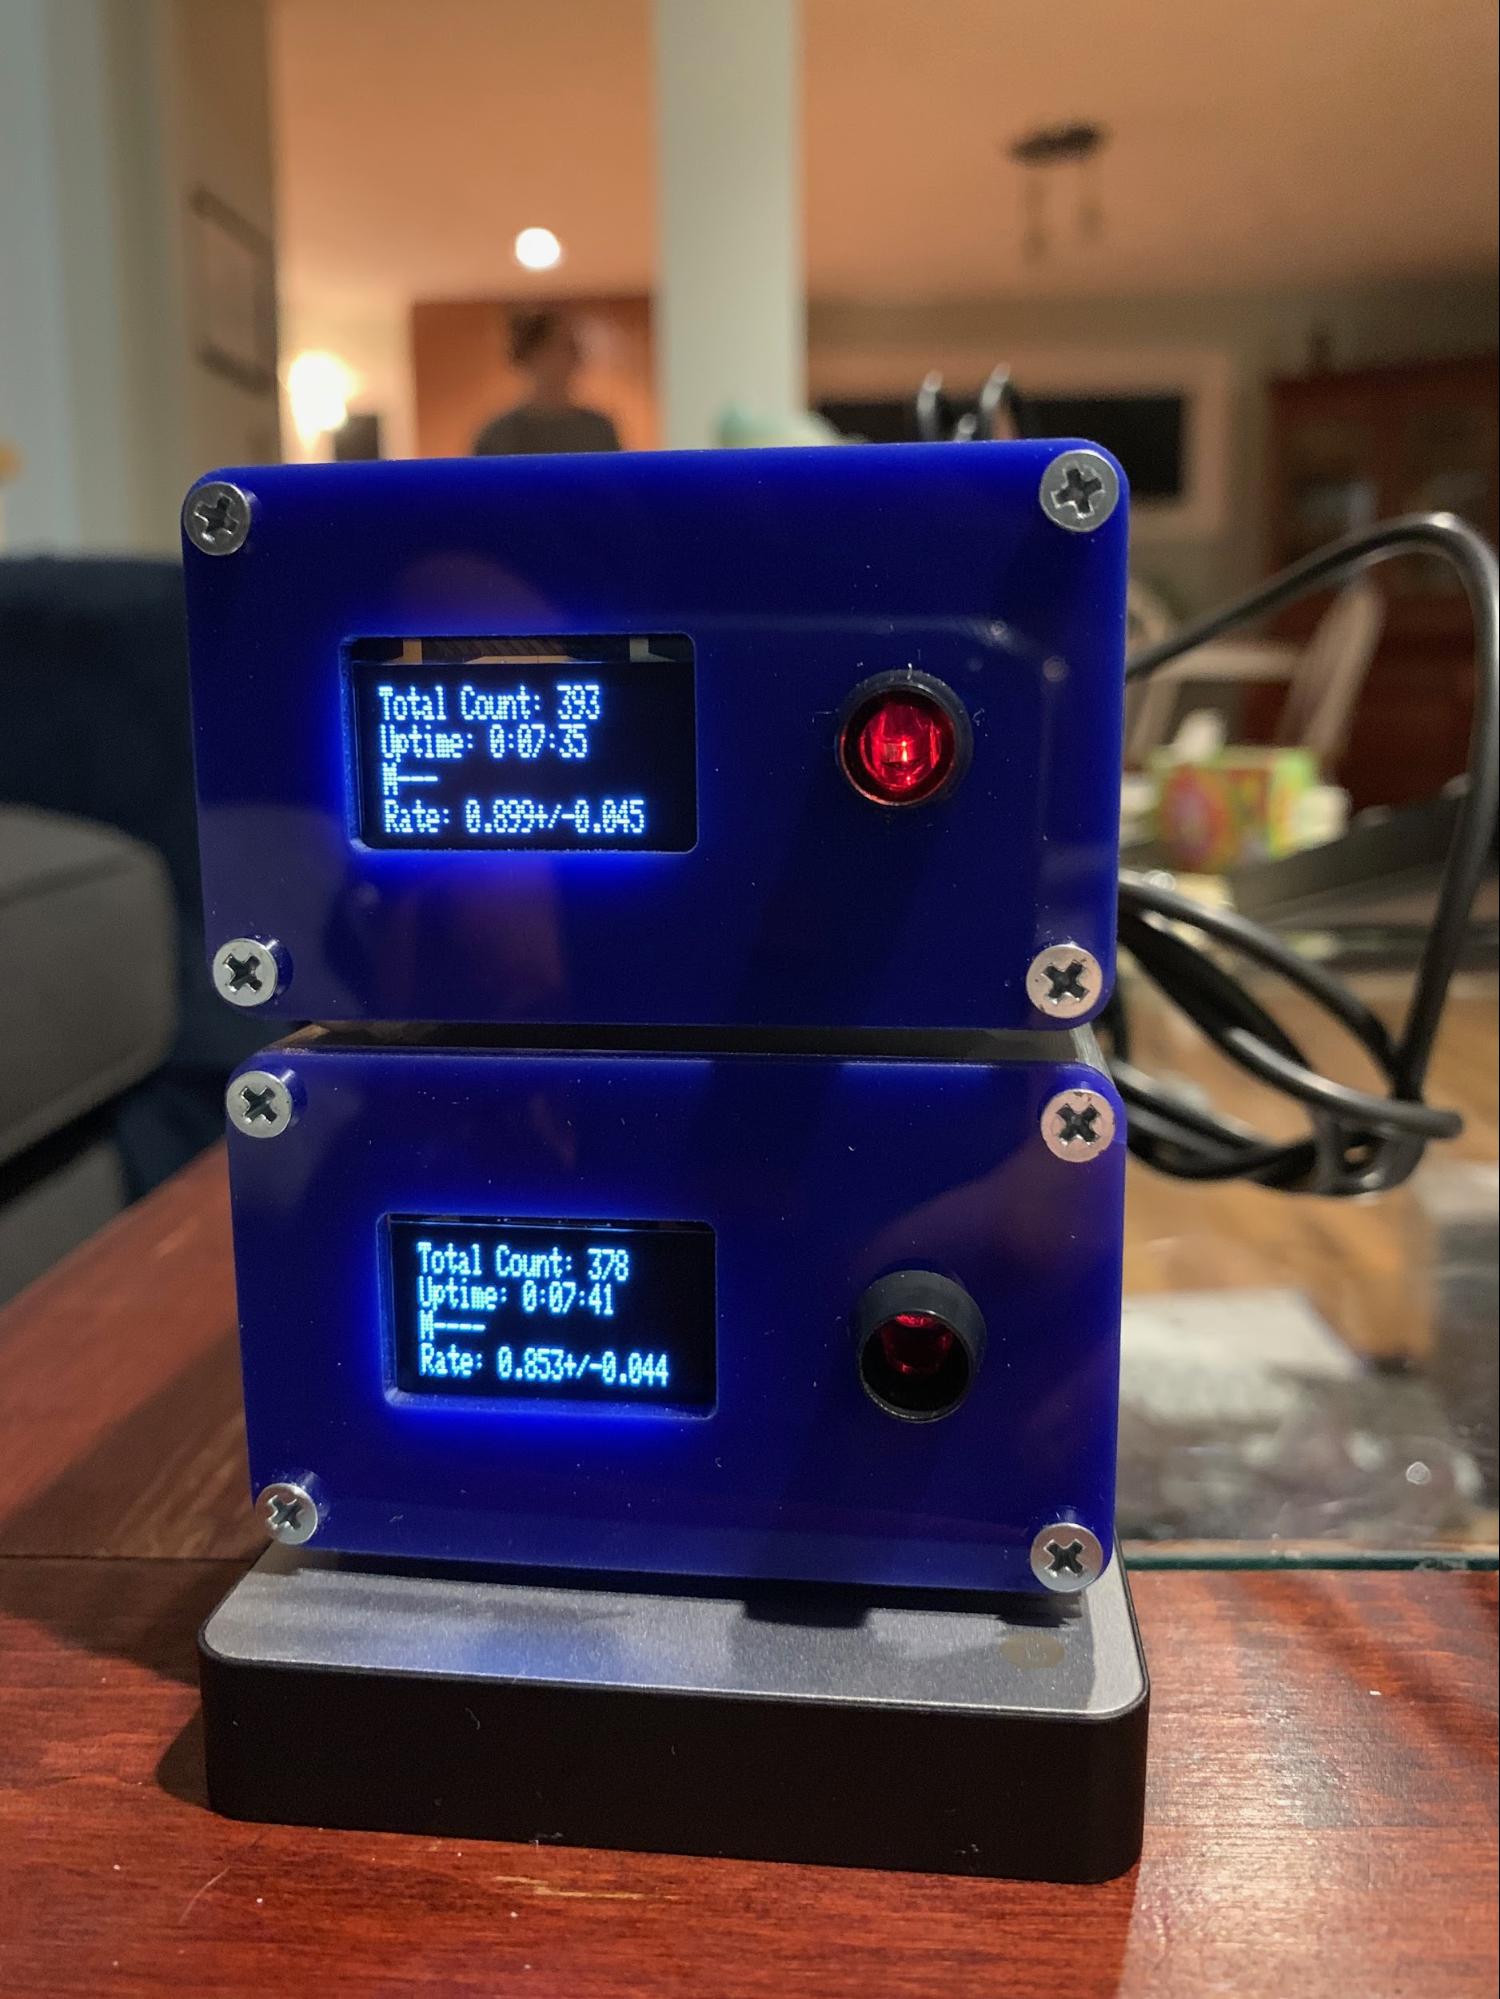
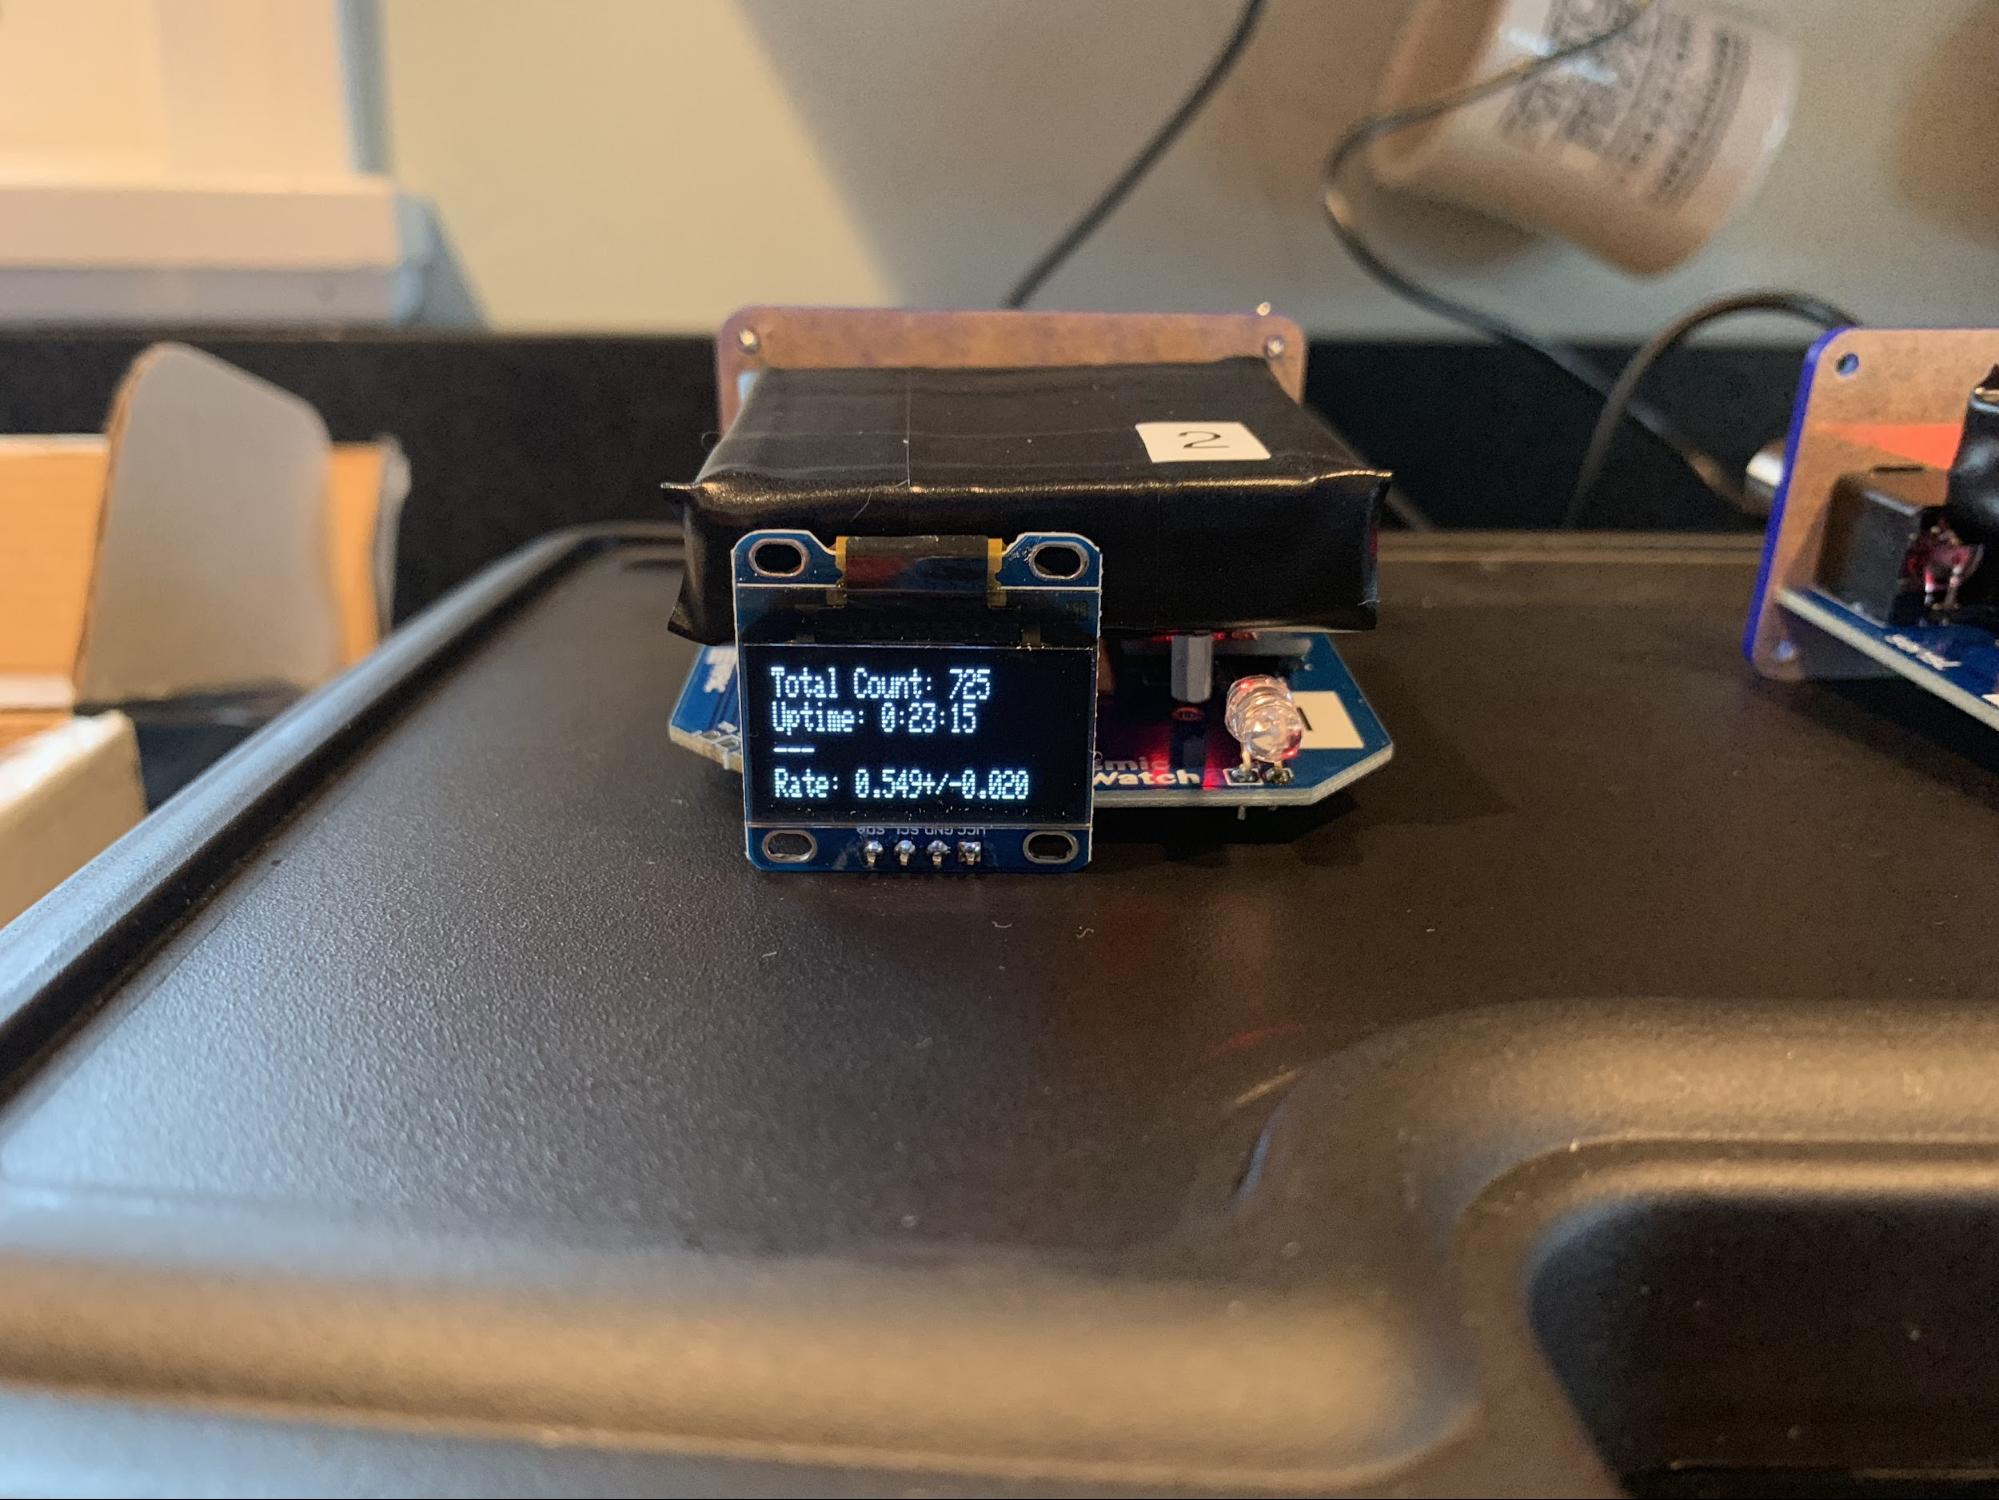
Now that all the components were connected, it was time to plug in the device and verify the test points before assembling everything together. The OLED board lit up and displayed the CosmicWatch logo, so far so good. Next I checked the bias point for the SiPM, 29.4volts, right on target. Time to plug everything together and turn it on.
And there I see it, right on the screen, 0.5 counts per second, or one count every two seconds… eureka, it works! Or, at least I think it does. I’ve followed all the instructions and the result placed my count rate is right within the margin of error of the expected value. Without a muon gun (well, it hasn’t been open sourced yet), I have no way to verify the detections are actual muons. But with careful designed experiments (shielding the devices, or raising them up to higher elevation, for example), I can increase my confidence that the devices are working as expected.
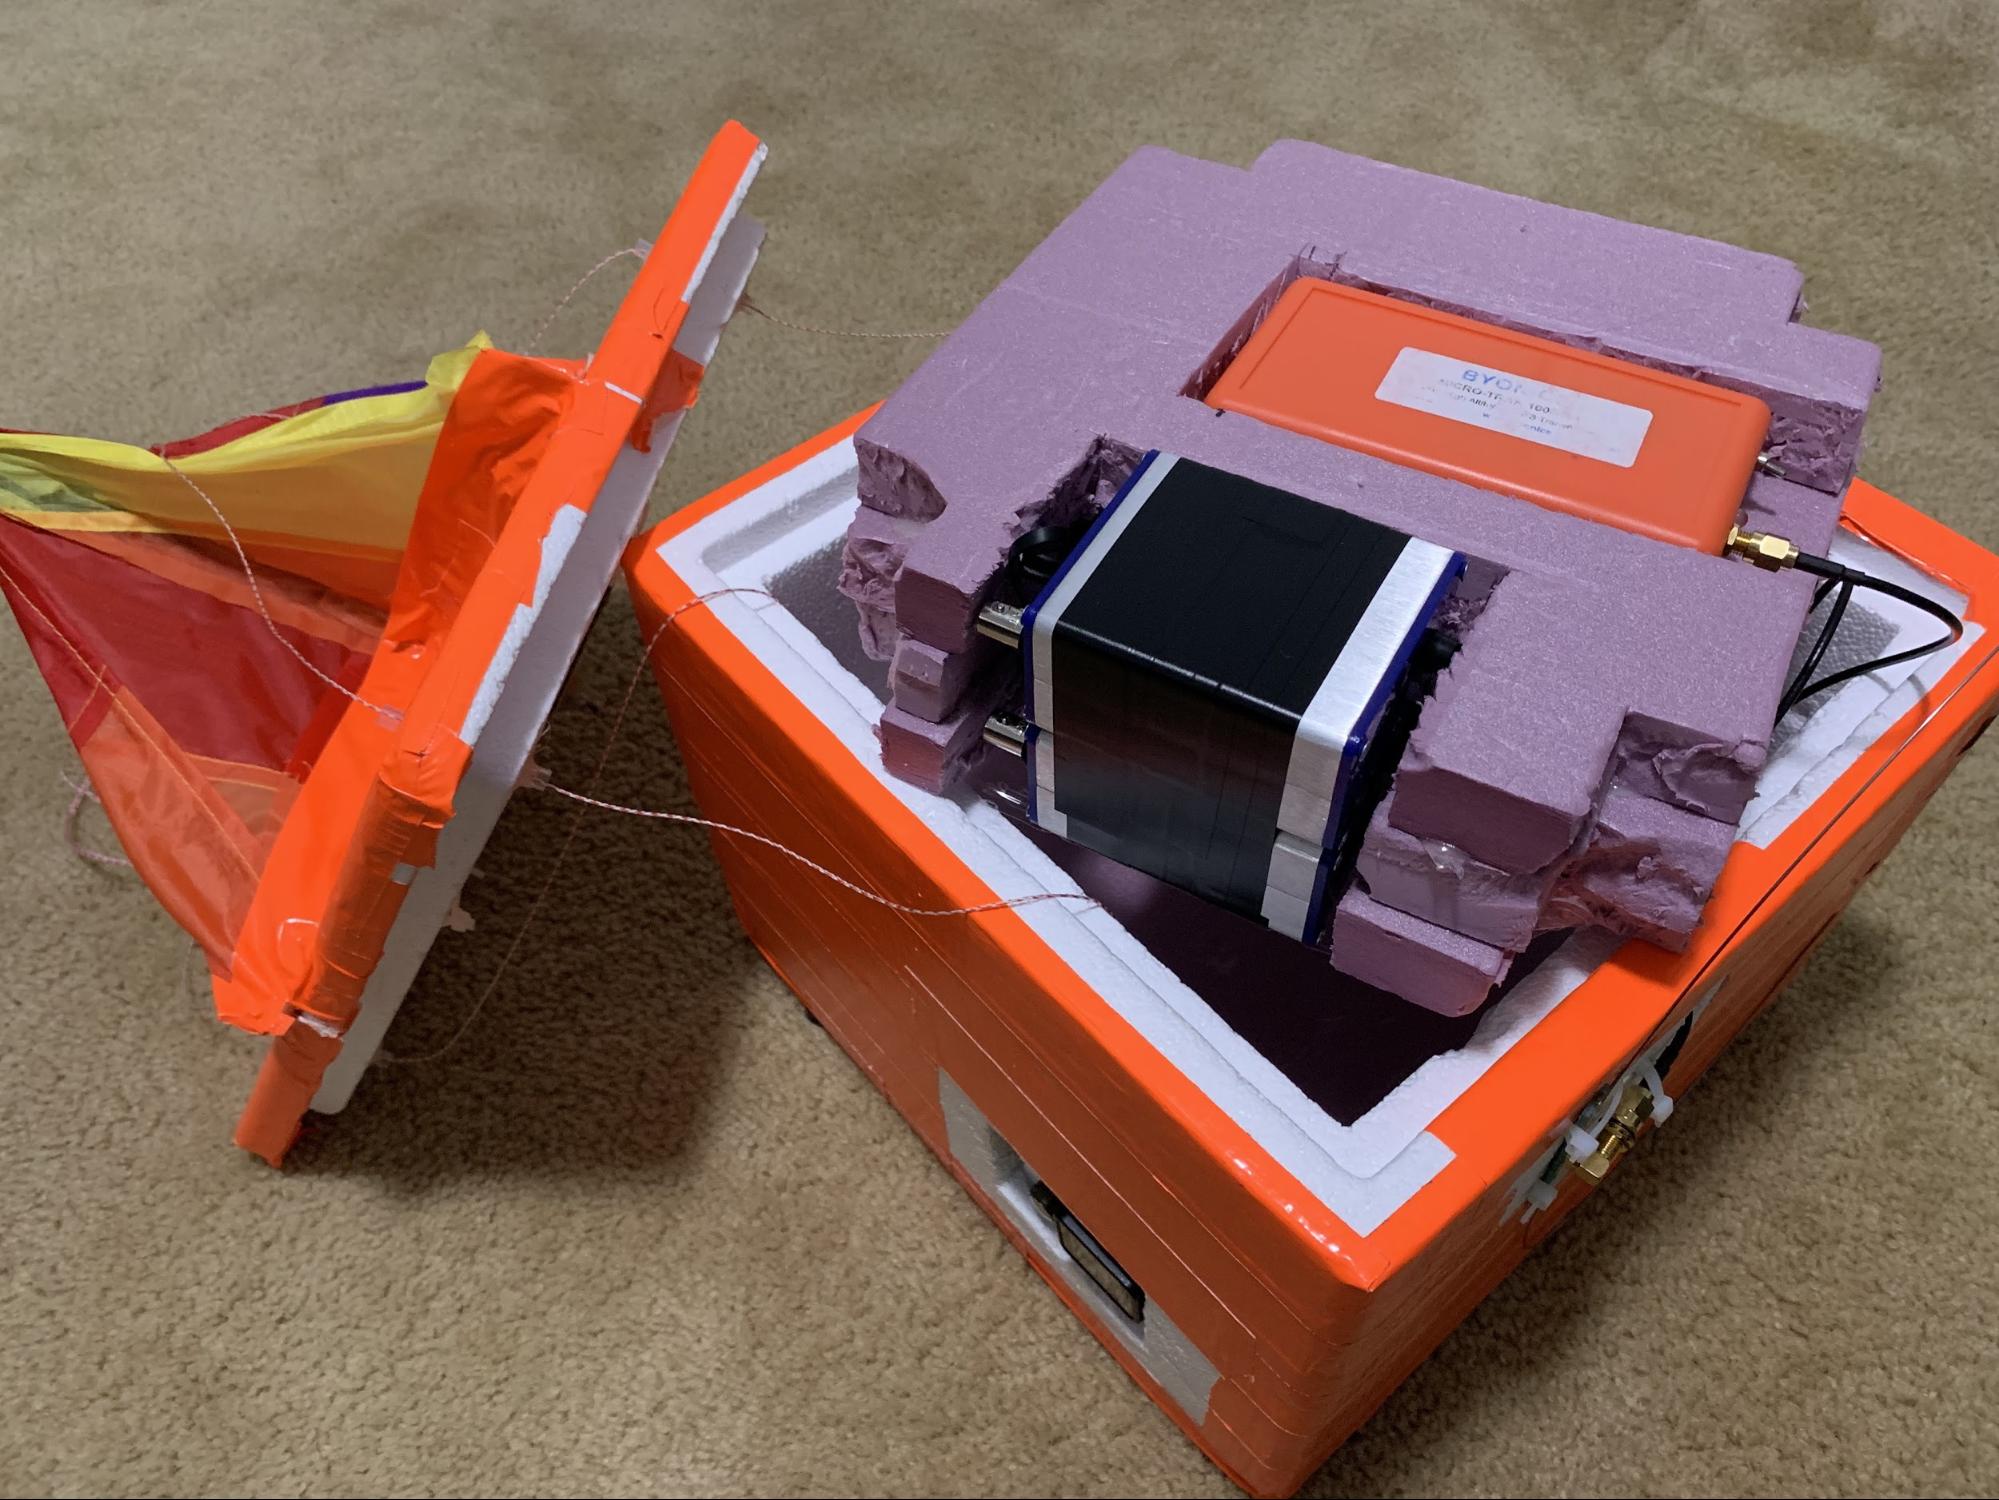
Payload
The second phase required installing the muon detectors into the payload. For this task, several layers of project foam boards found at Home Depot were glued together to fill up the inside of our existing Styrofoam payload container. From the stacked project board, cavities were then cut out to make necessary room for the detectors, as well as a lithium-ion USB battery pack. Other cavities were also cut out to make room for the two GPS trackers, two point-and-shoot cameras, one GoPro, and one additional flight logger, the FlightCPU I had designed from a previous project.
FlightCPU Writeup: A CPU For Balloons
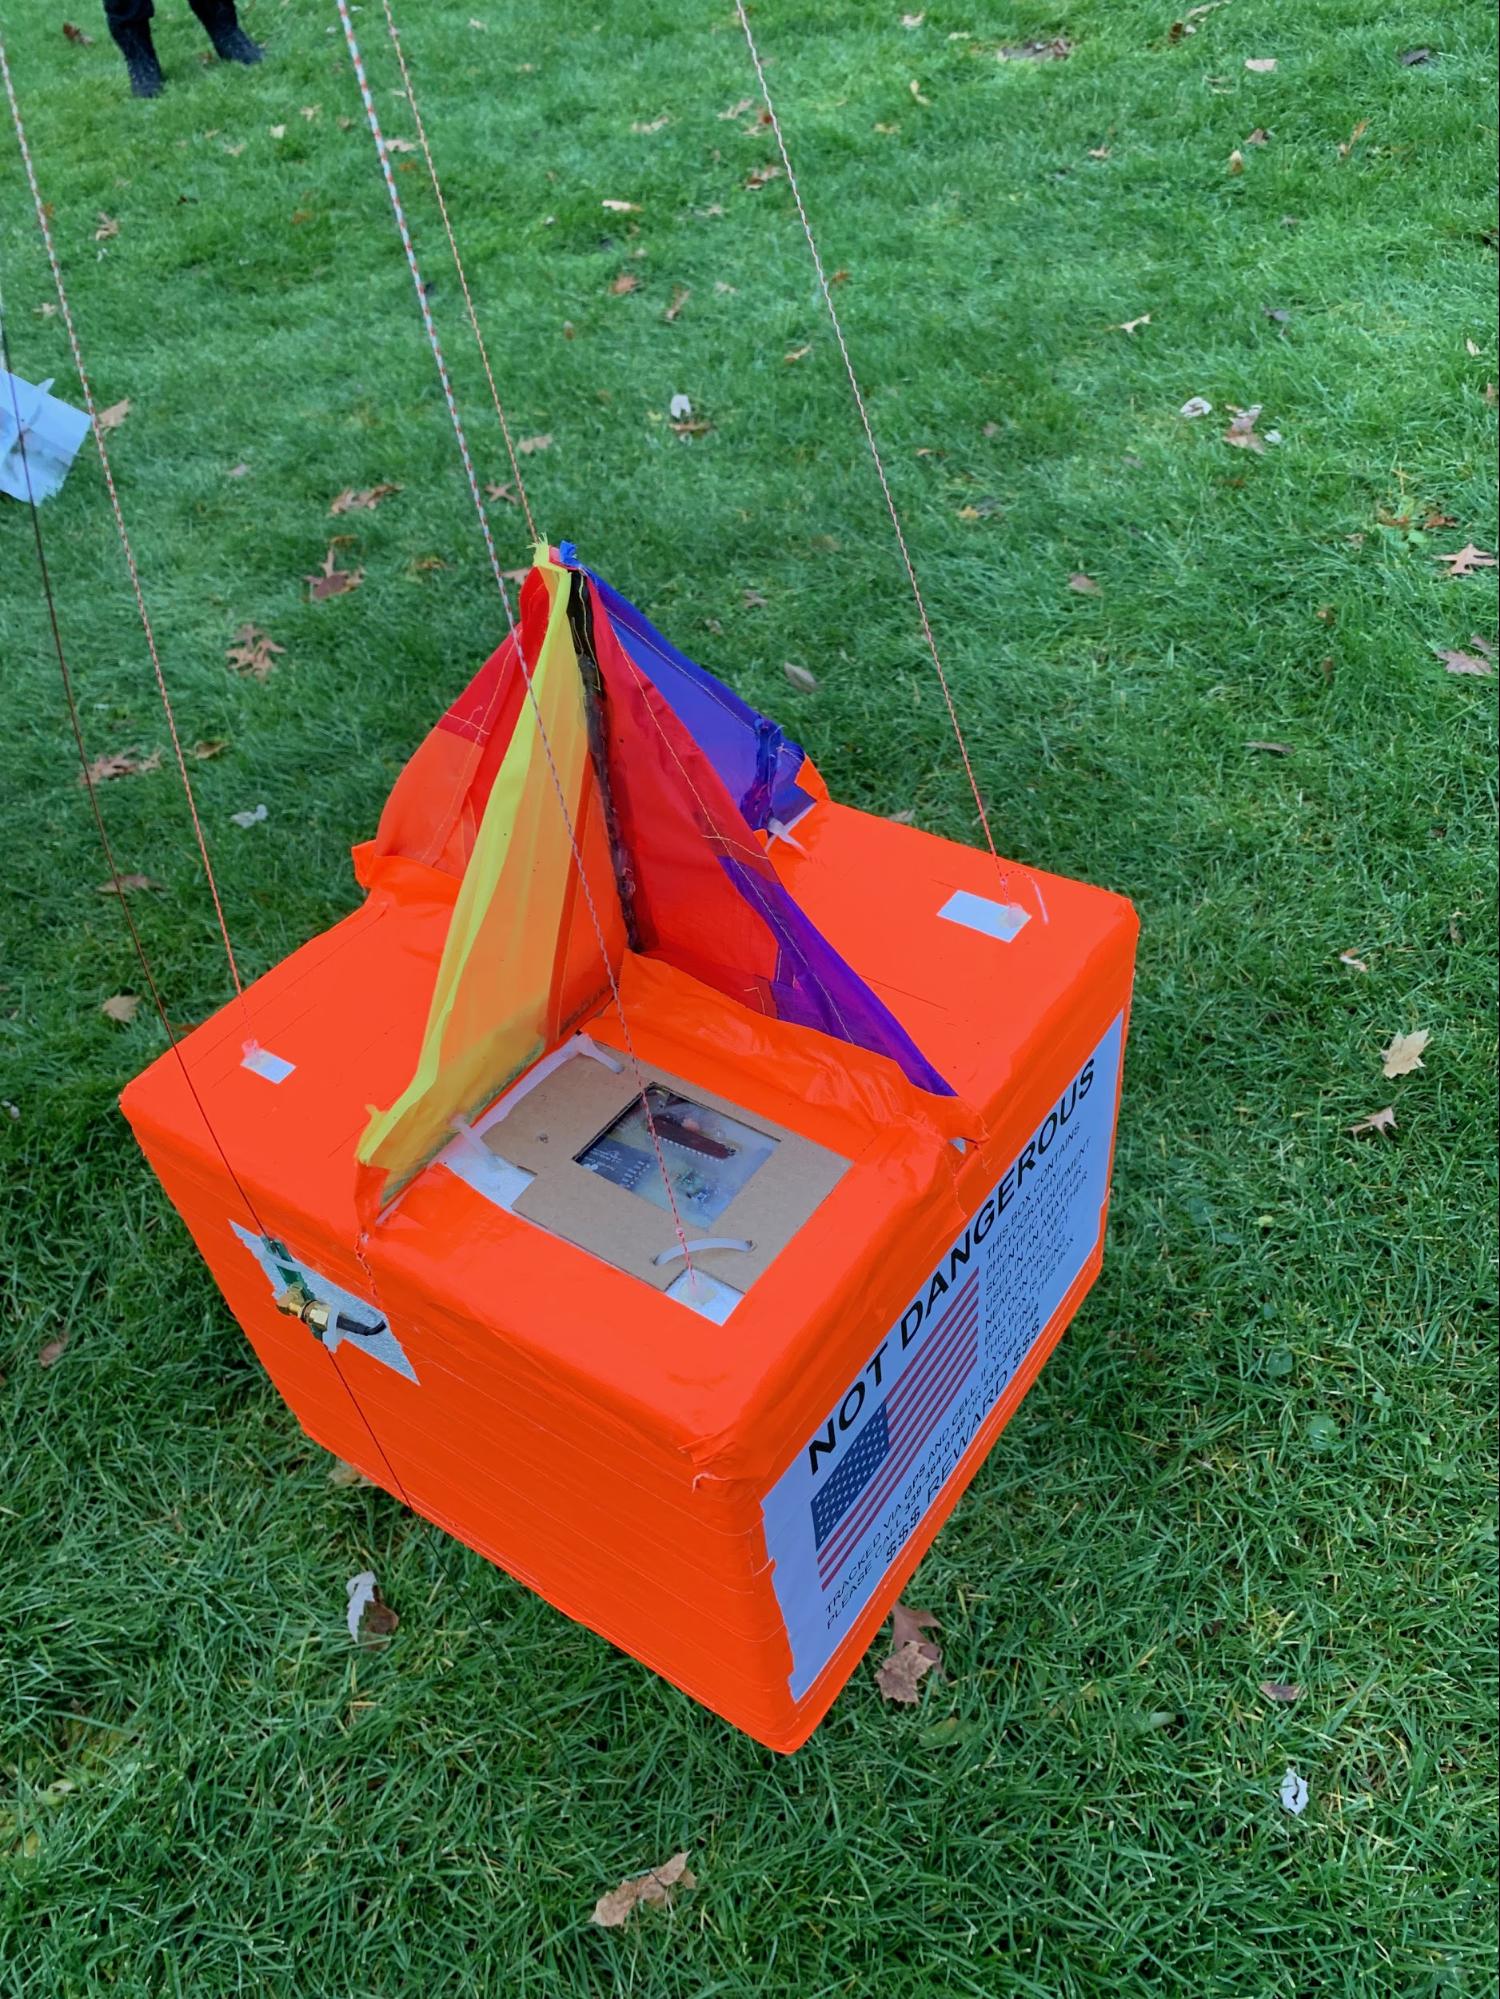
The Launch
There are many contributing factors that can determine the success and failure of a HAB launch. Some you can control, most are just out of our reach. Wind can change the trajectory drastically, as well as complicate the initial inflation and launch. Other factors such as the height the balloon pops, alters the descent and ultimately the landing location. It is part of this adventure that can make launching a HAB so fun.
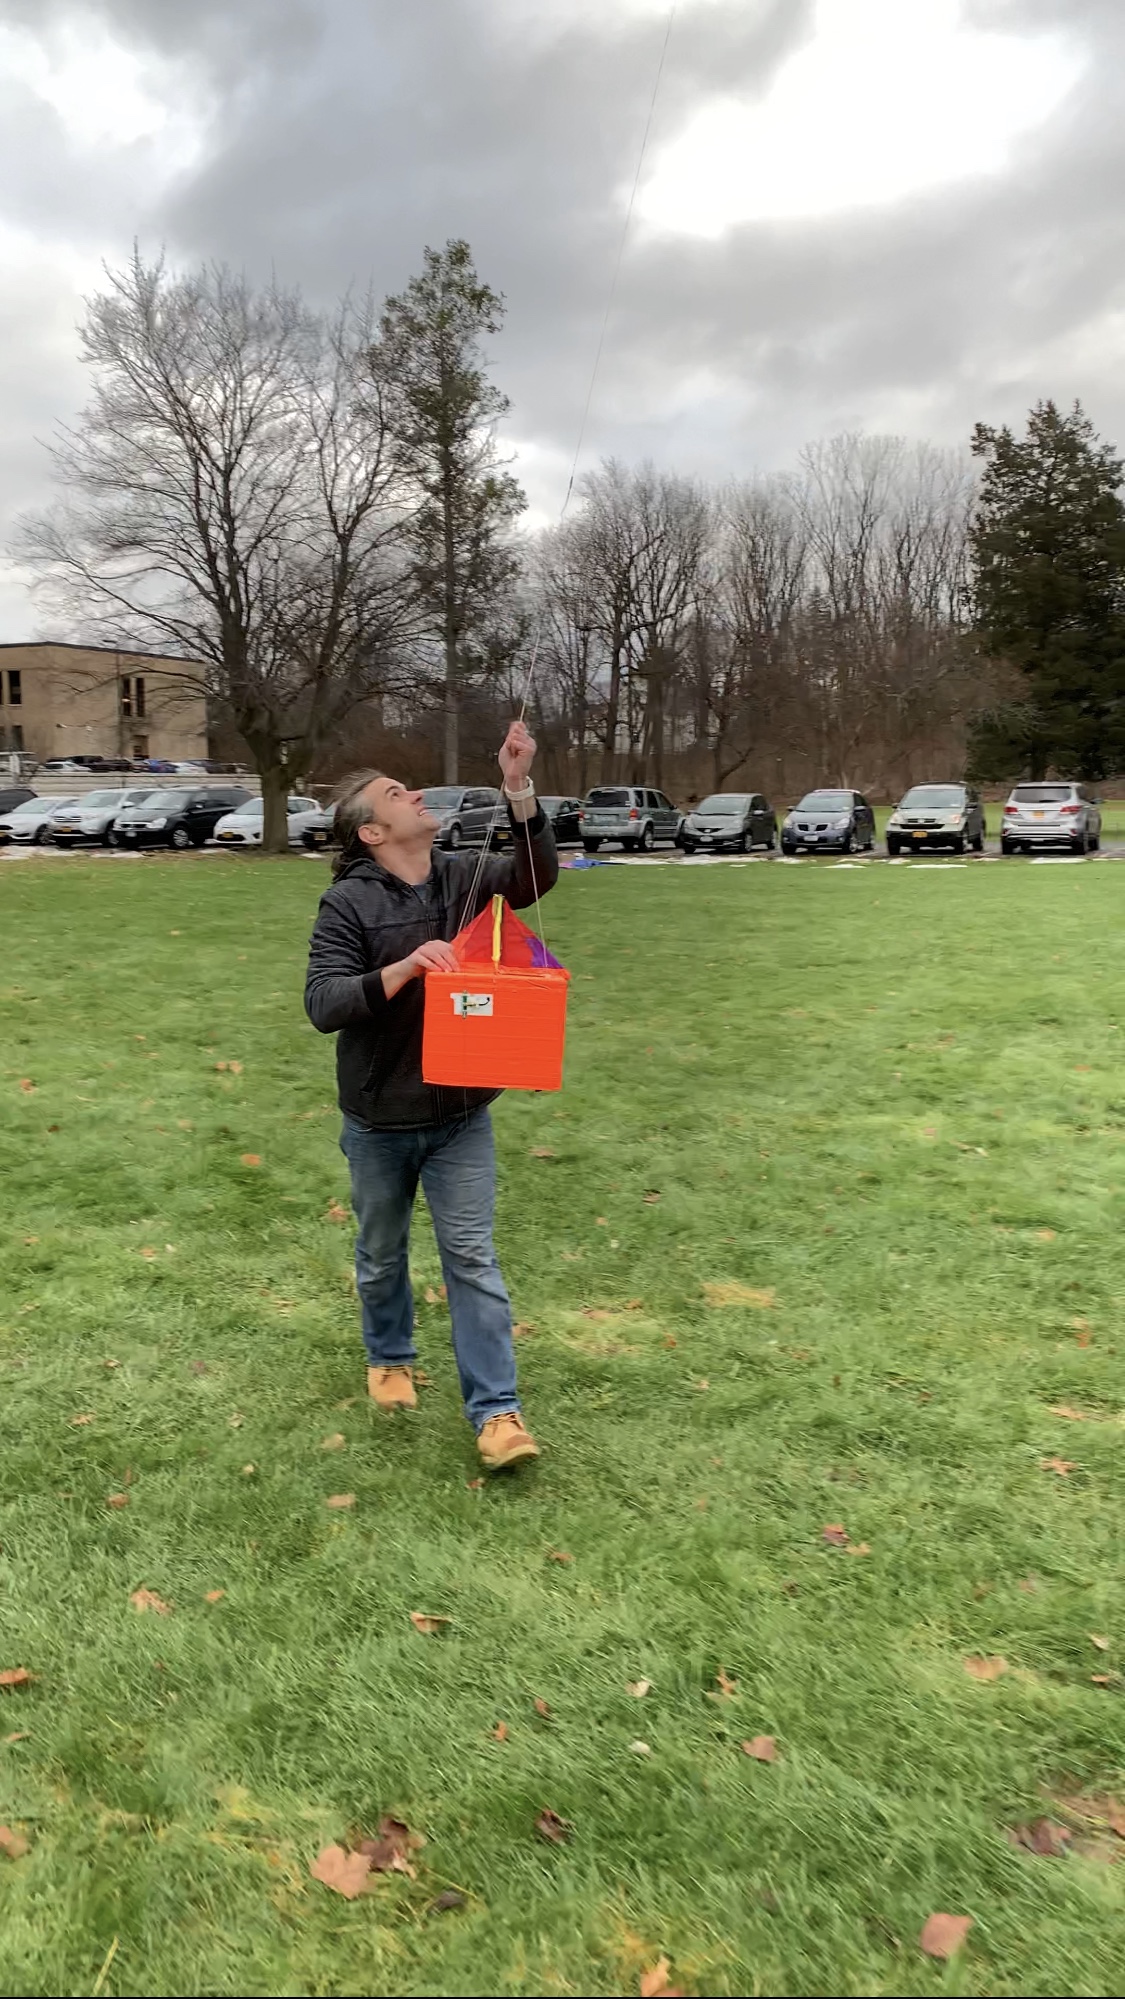
Although my brother and I have deployed HABs previously, this time the launch did not go as expected and this contributed to subsequent changes in the trajectory. Upon initial launch, there was not enough helium to inflate the balloon as necessary (assumed to be a leak in the inflation line). Fortunately, a welding supply company in the area was able to provide additional helium, and within 45 minutes we were continuing the process of inflating the balloon.
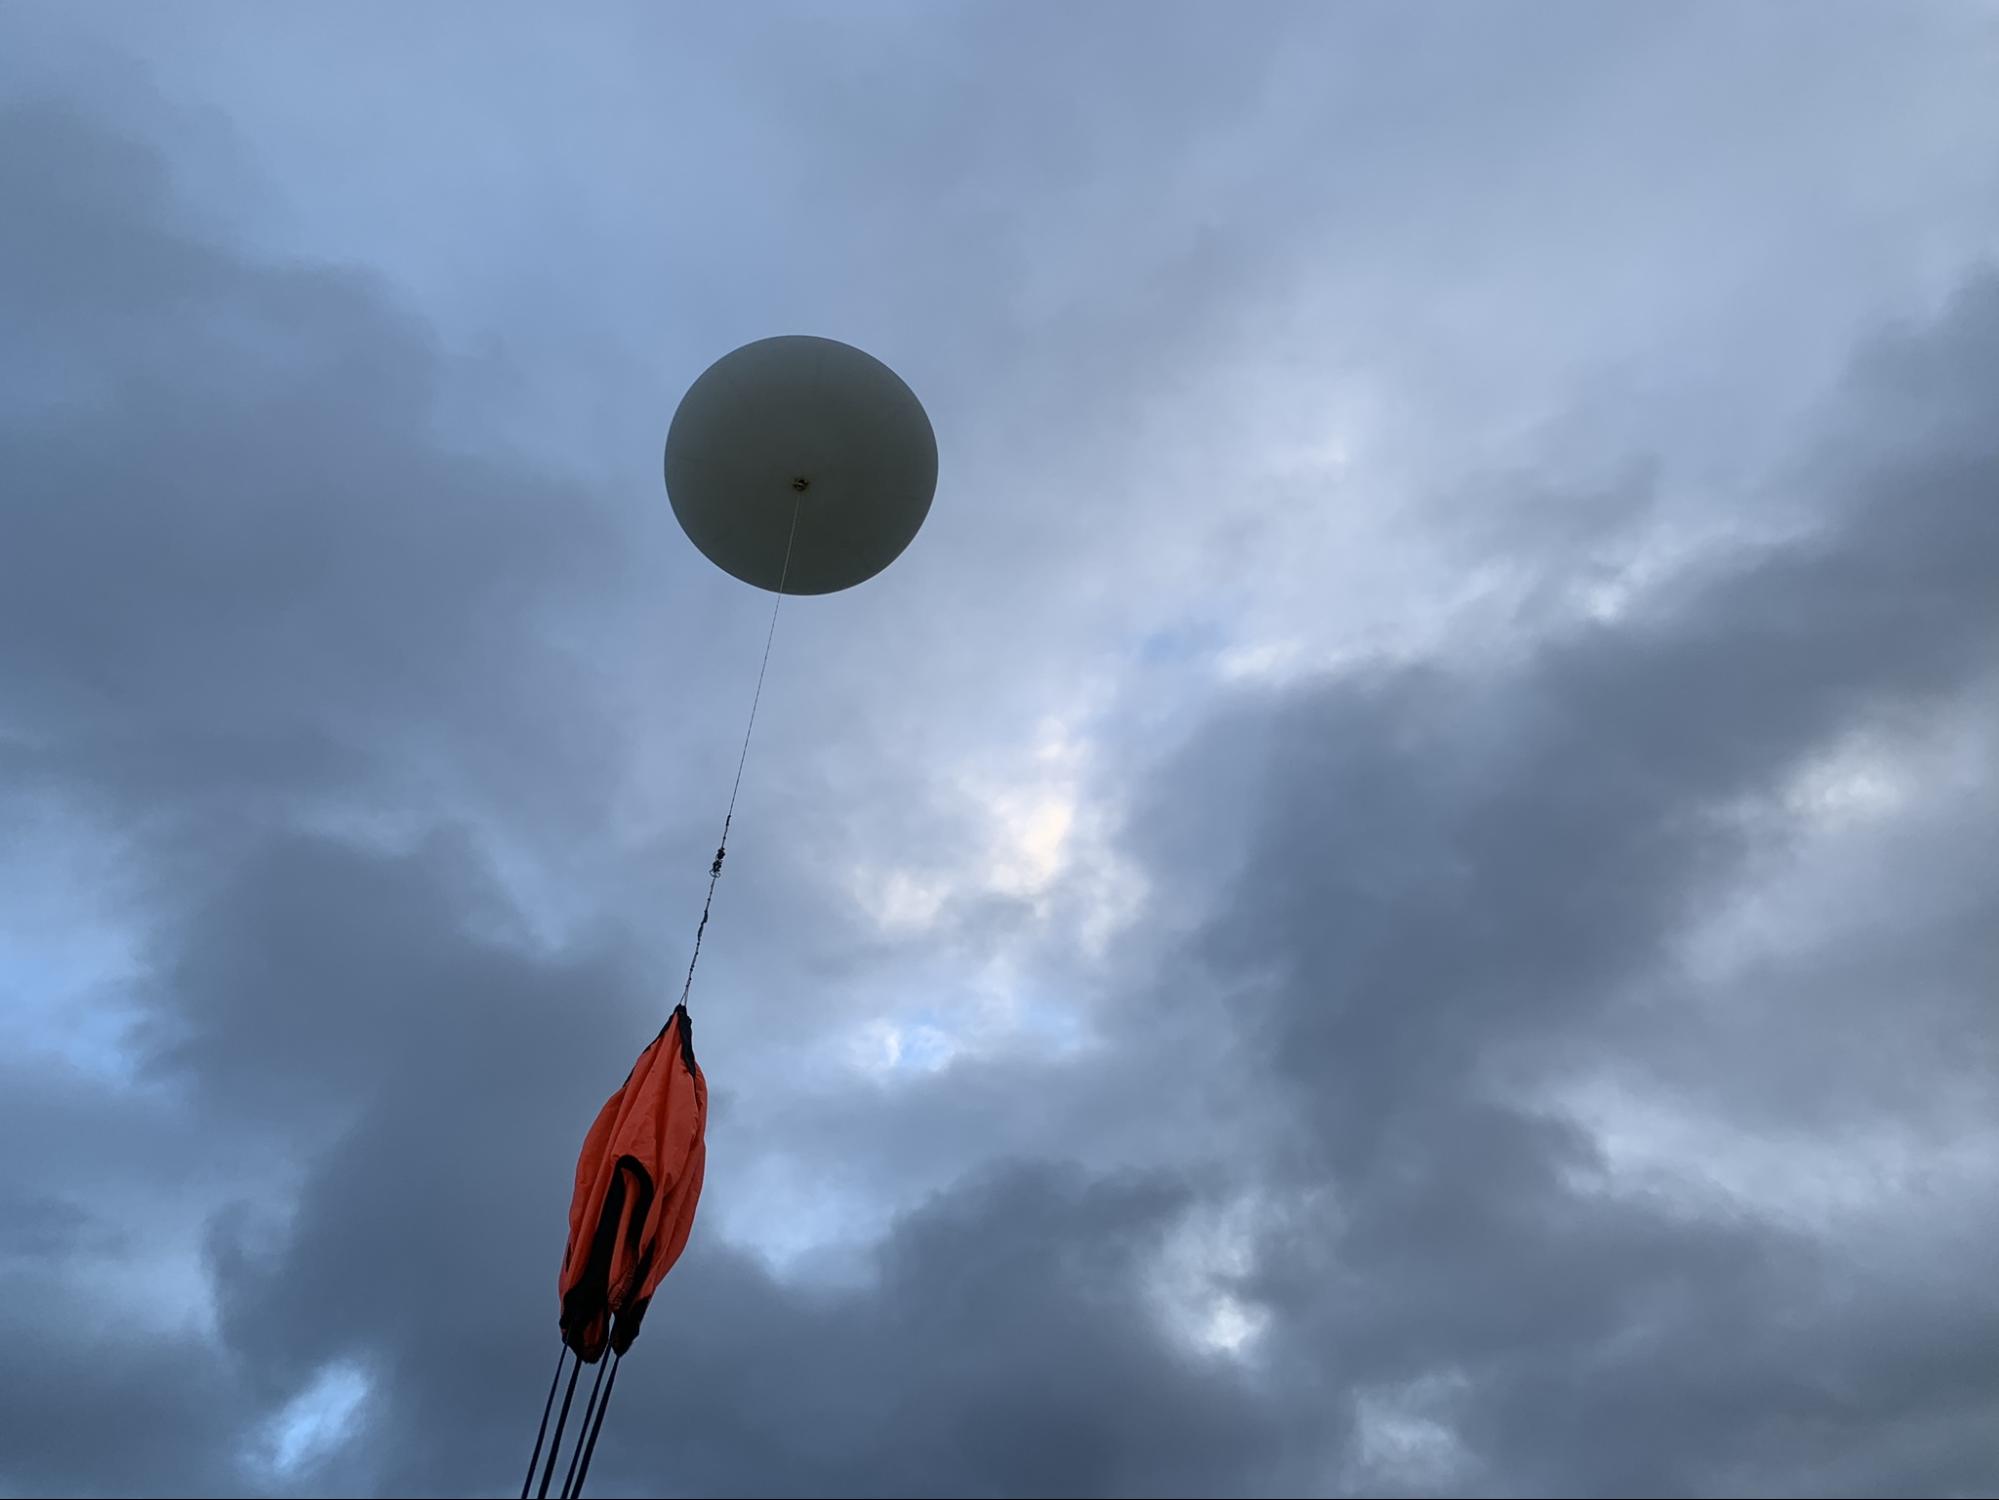
It is at this moment we notice a hole has formed in the balloon- helium is now leaking. Desperation sinks in; we quickly grab scotch and electrical tape and do our best to plug the hole. But since the balloon is latex and covered in a fine powder, nothing seems to want to stick to the surface. We finally get what seems like a flap of tape to stick over the hole and declare this our best chance to launch.
The Chase and Find
With everything that had happened during the launch, the assumption was the balloon would go up a few thousand feet and then descend as the air escaped. At most we thought it would travel a mile or two and our adventure would be short-lived. At least we got the payload off the ground and over the tree line as it left the park. We packed up the car with all the supplies, dropped of the extra helium tank, and pulled up the tracker locations on our phones.
If everything had gone to plan, we expected the balloon to reach over 100,000ft. in altitude and travel just about 200 miles. Having launched in upstate Newark, New York, that would put a landing location just east of Syracuse, NY. So at 10,000ft we high-fived, it seemed improbable it would last much longer.
… 20,000ft. … 30,000ft. … All right, we reached our primary goal of 33,000ft, the airplane cruising altitude. Any data collected after this would build upon a dataset collected during a flight from BOS to LAX. … 40,000ft. … At this point we start getting nervous. Not only is it continuing to go up, it is doing it very slowly. What if it never pops and just continues to drift at a steady altitude? We watched as it continued from New York into Vermont. It’s mountainous in Vermont; we may not be able to get to the landing location … 50,000ft … From Vermont into New Hampshire. The balloon approaches Mount Washington and due to the jet streams, it reaches speeds of up to 250 miles per hour. We start to worry it might pass through Maine and out to sea.
… 60,000ft … It starts to descend. We weren’t sure if it had popped or the patch job finally gave way and the balloon was slowly leaking. After a couple of updates, the answer was clear, it was slowly descending which meant it was going to travel further out towards sea. From New Hampshire into Maine. It seems like it will travel towards the direction of Portland and Augusta, which is ironic because my family owns property in Winthrop, Maine, right outside of Augusta.
At this point we have made the drive into New Hampshire, but we are still at least 3 hours away from the estimated landing site. The balloon’s last ping was 300ft. above the ground, indicating that it had landed in an obstructed site. Worse it might have landed in water and all data could be lost; the search area calculated from its last ping included a pond and small lake.
So we get a hotel for the night and decide to continue our search in the morning with the help of daylight.
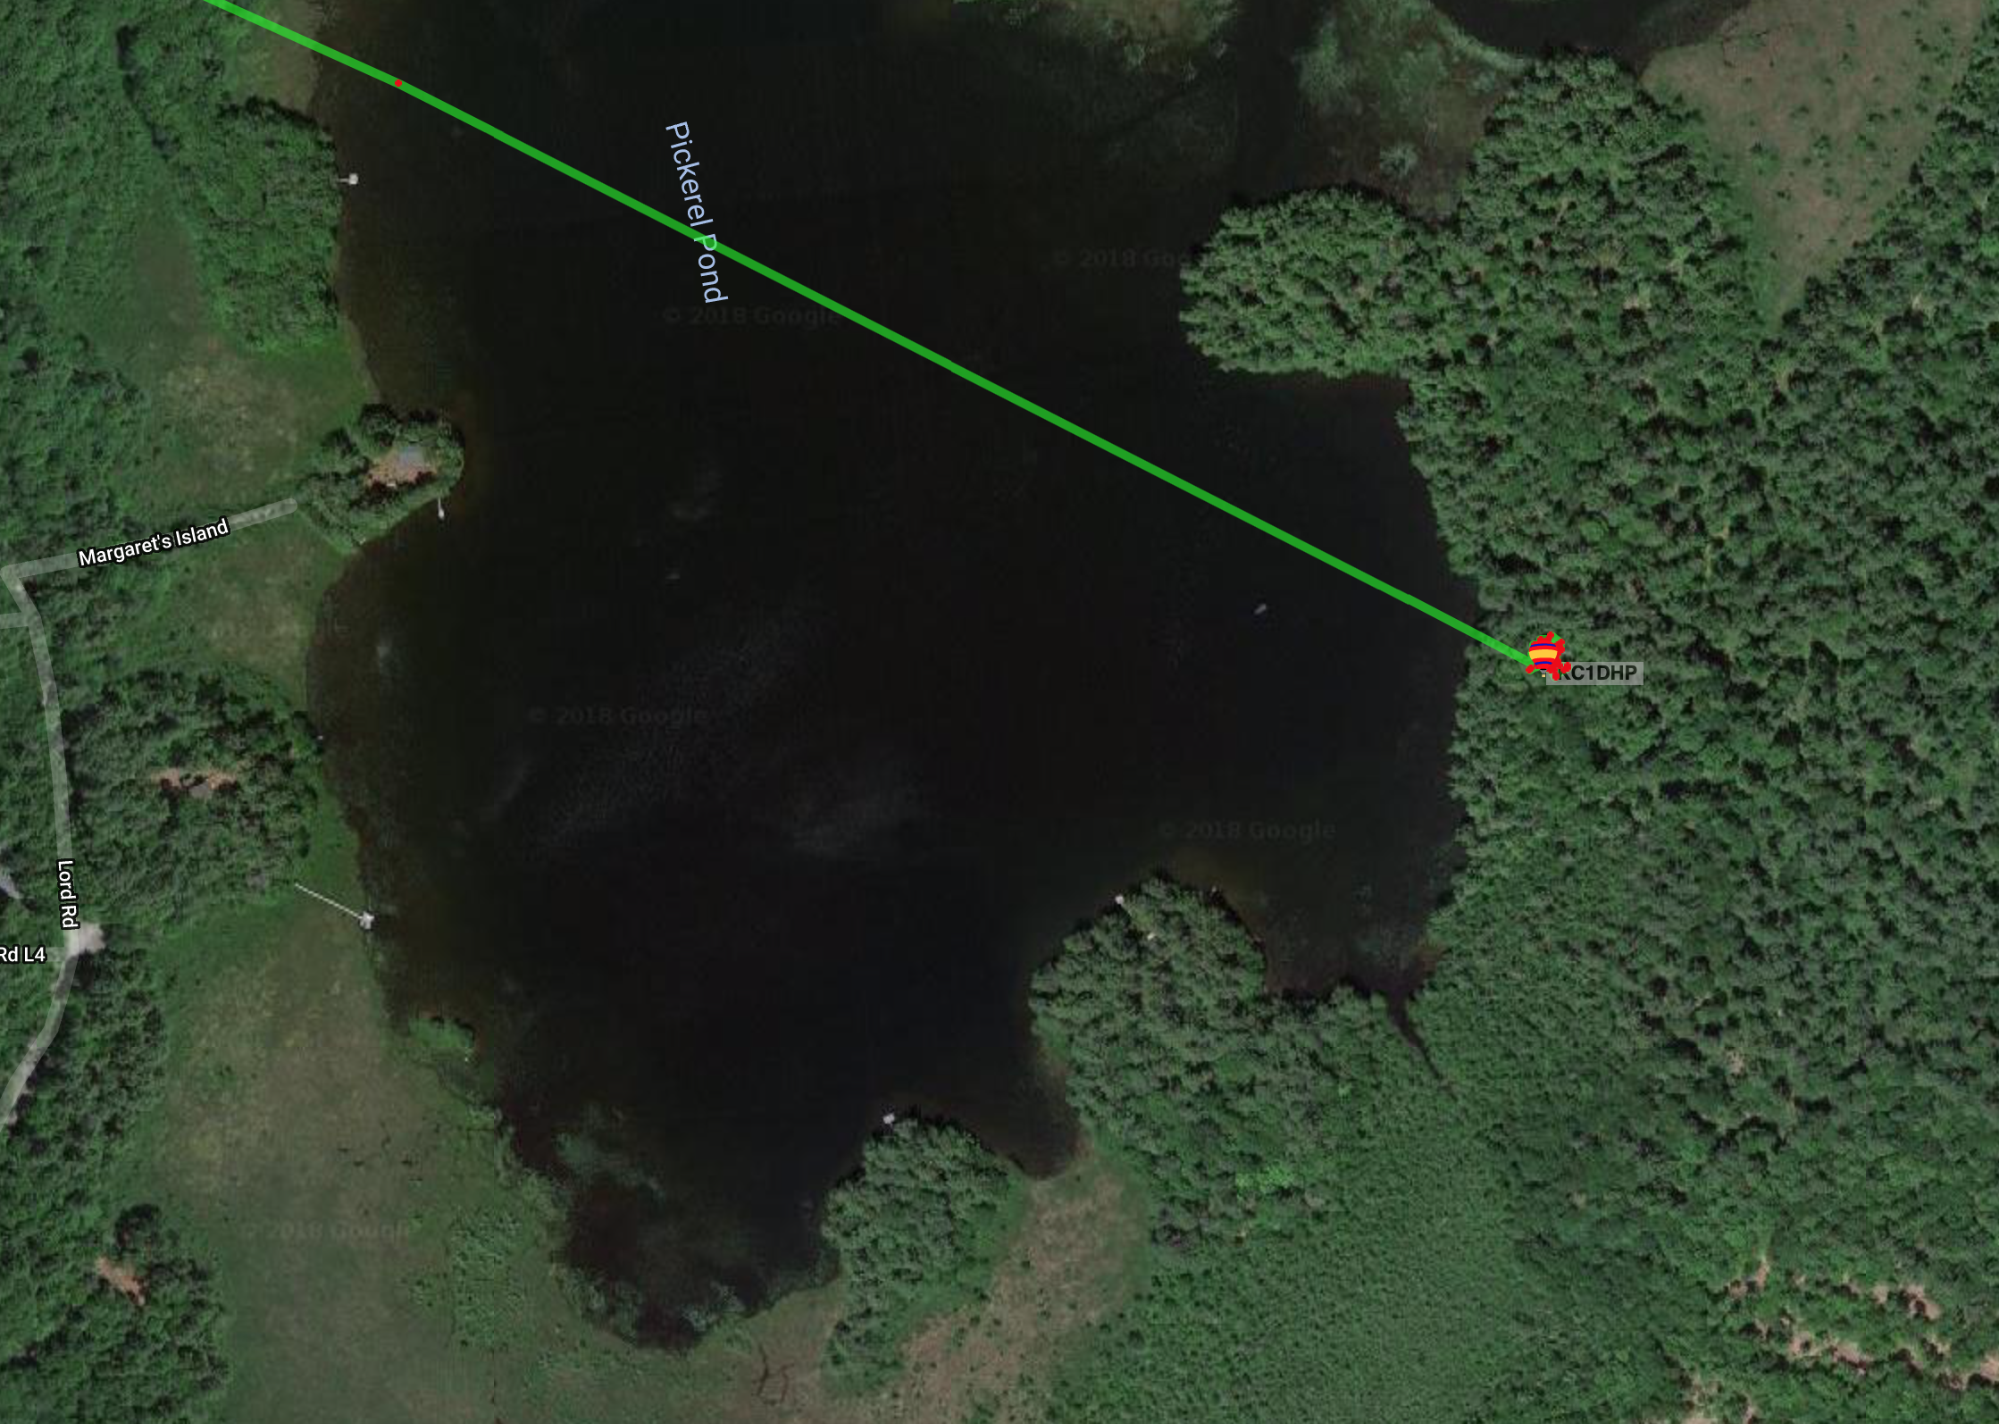
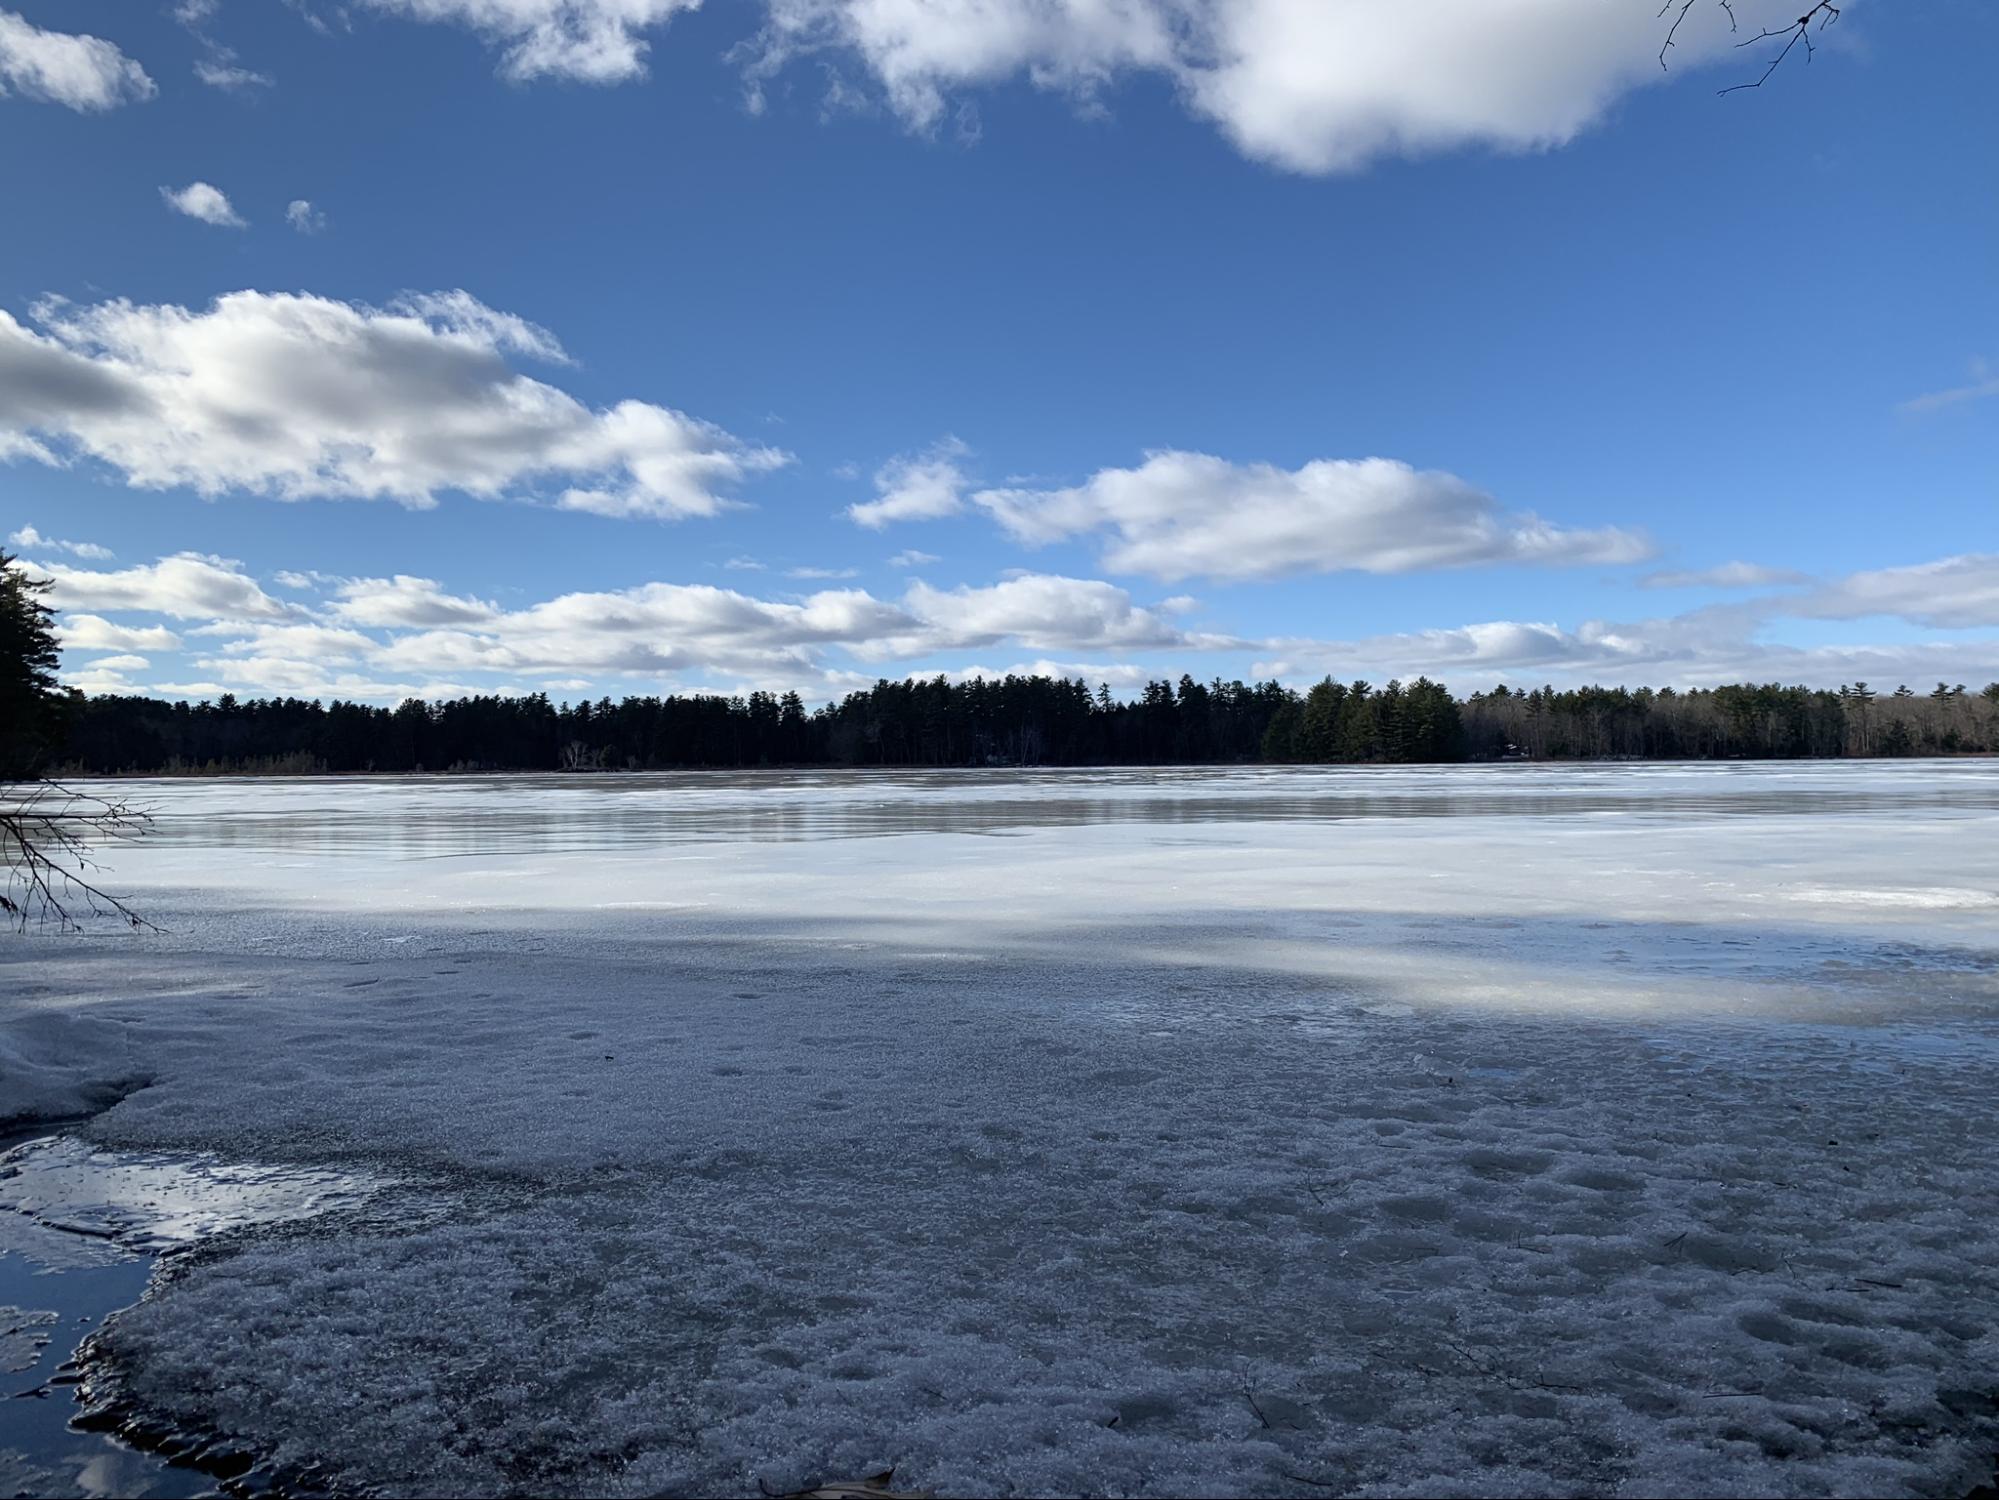
In the morning, we re-check the GPS Tracker and somehow overnight a dozen more updates had propagated through the obstruction and the landing site was clearly marked. We knew immediately it had not fallen into the pond, but it looks like it had come down right over the lake. So we first headed out to the other side of the lake where it was more accessible and attempted to look out across the water to see it in the tree line as it had swooped down across the lake. No luck.
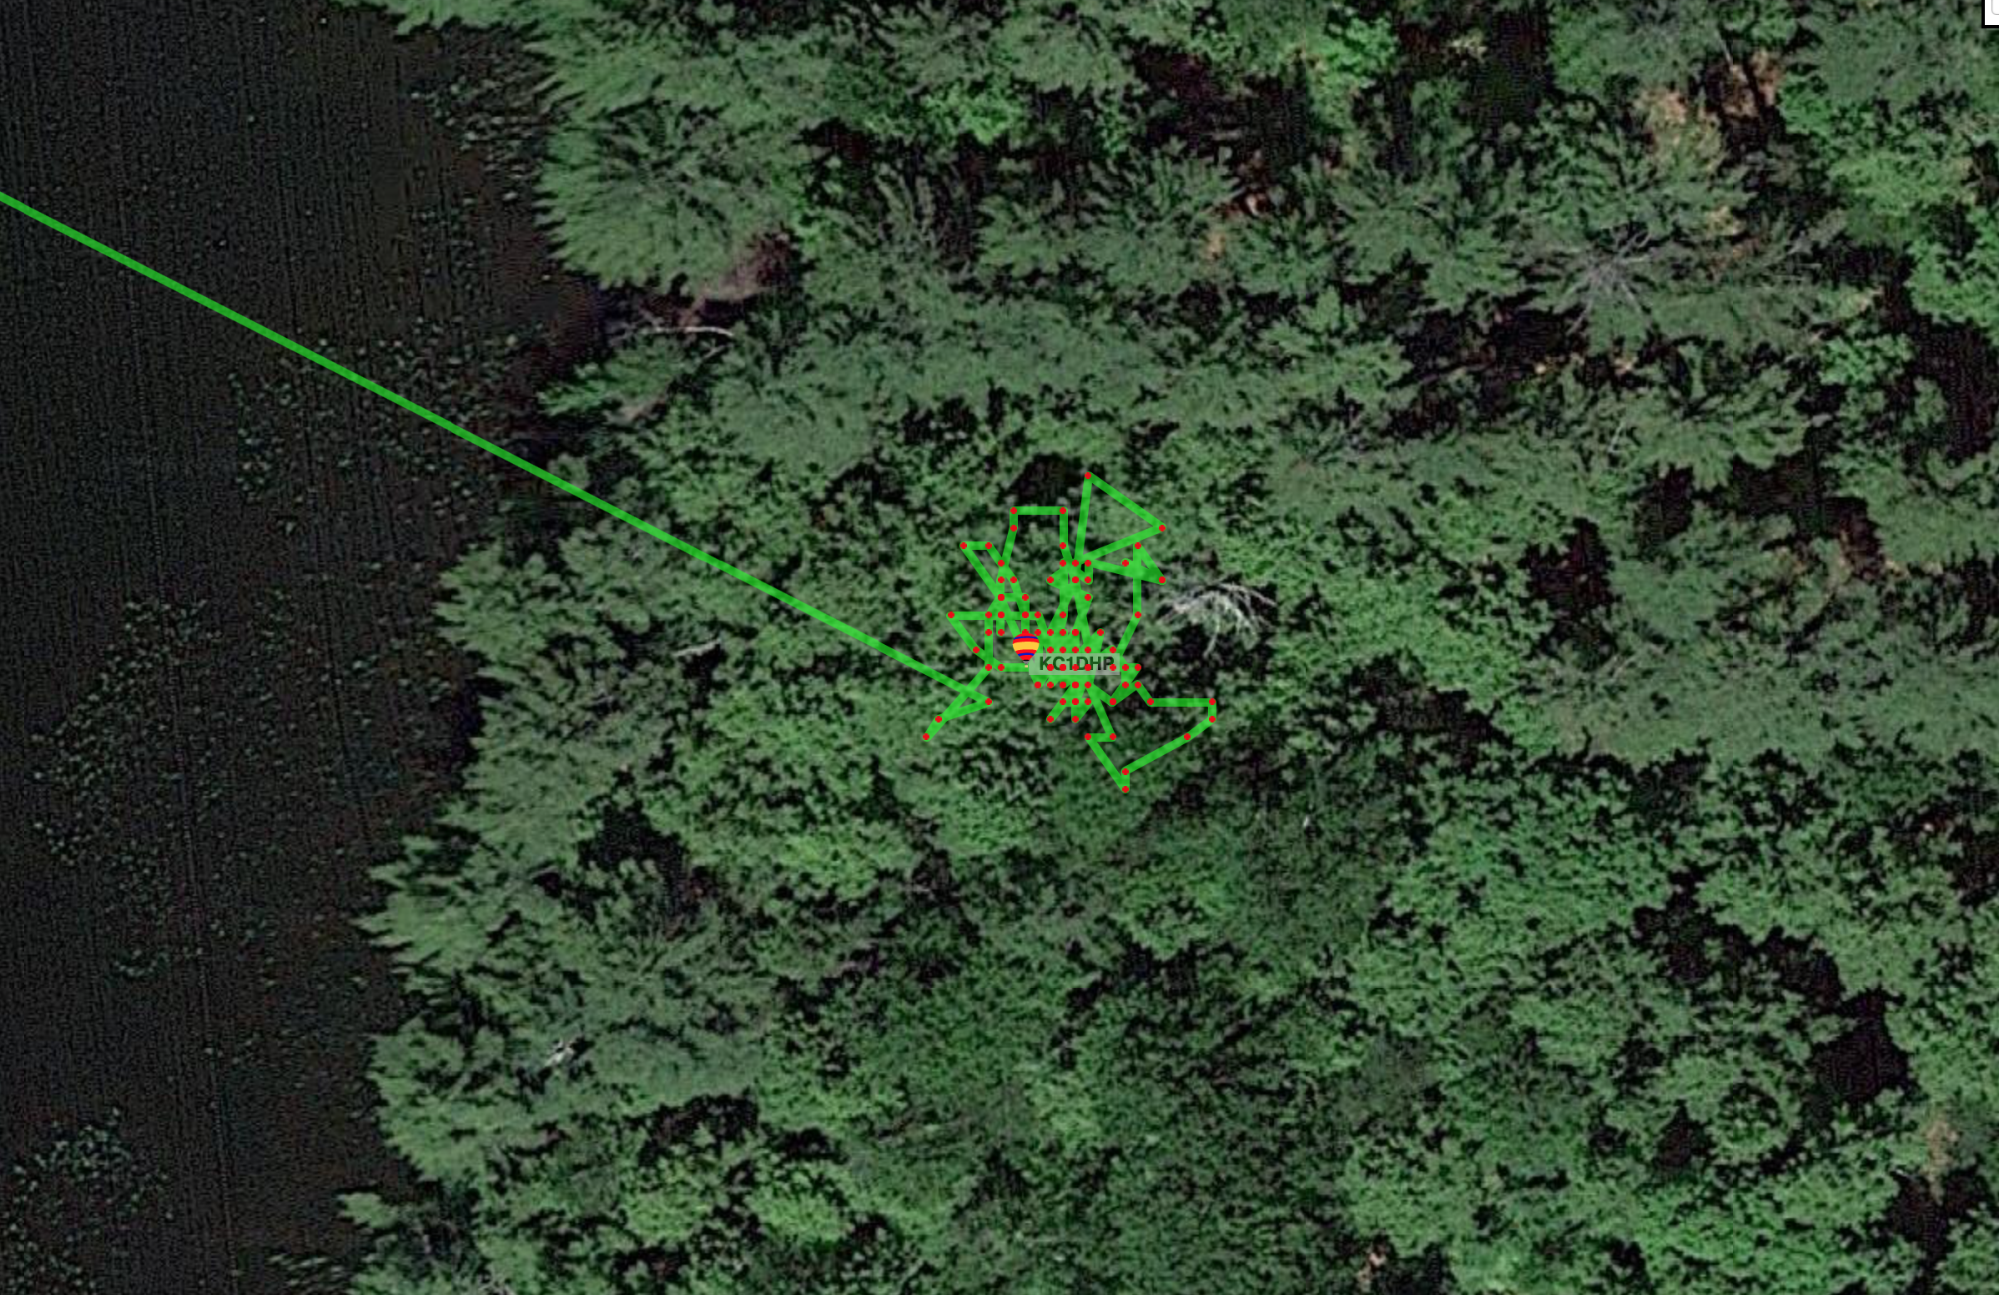
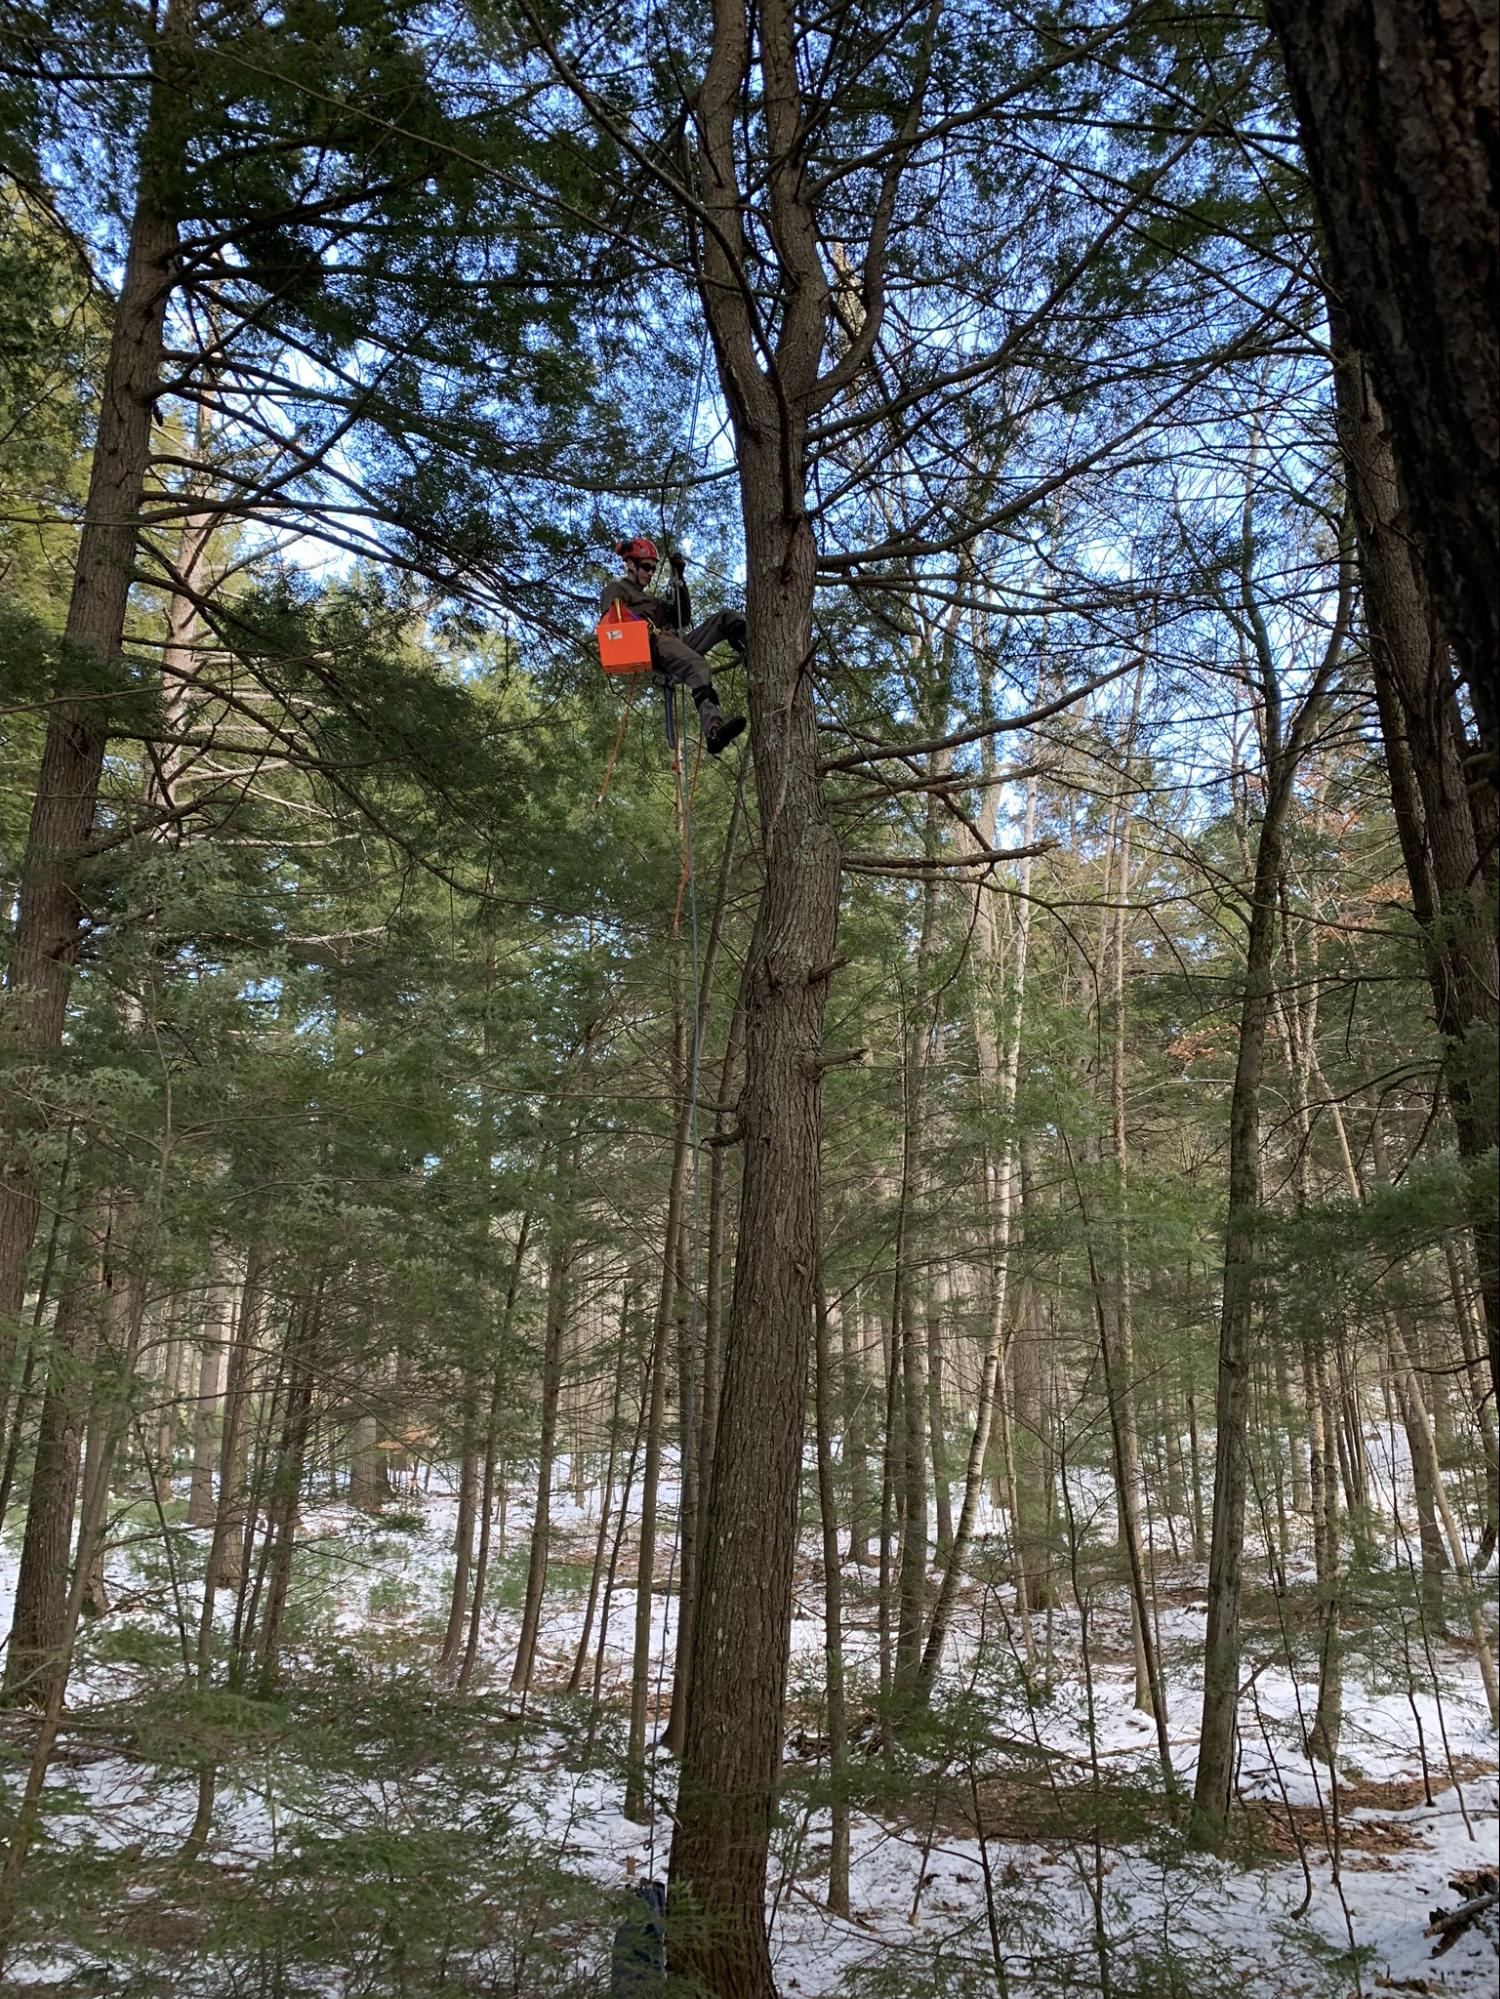
We continued on around the lake, but the roads could only take us within one mile of the landing site, the rest would have to be on foot. After a 20 minute walk up a snow covered road, and another 20 minute walk through the woods, we finally reached the estimated location. Great... 100ft trees were everywhere; "at least it didn’t land in the water," we tell ourselves. After a thorough search, we finally spot the balloon and payload up in one of the taller trees. It now becomes apparent we are going to need help getting this balloon down.


At this point, the best way forward is to hire a tree climber or put an ad out on craigslist (it can be a slow time in the winter). We’ve marked the location; we will coordinate with outside help and make arrangements to visit a following weekend. We update everyone who has been following along with our status, and let them know the recovery is put on hold.
Ping! "Don’t go anywhere. Call this guy, he might be able to help." And just like that, the adventure is back on!
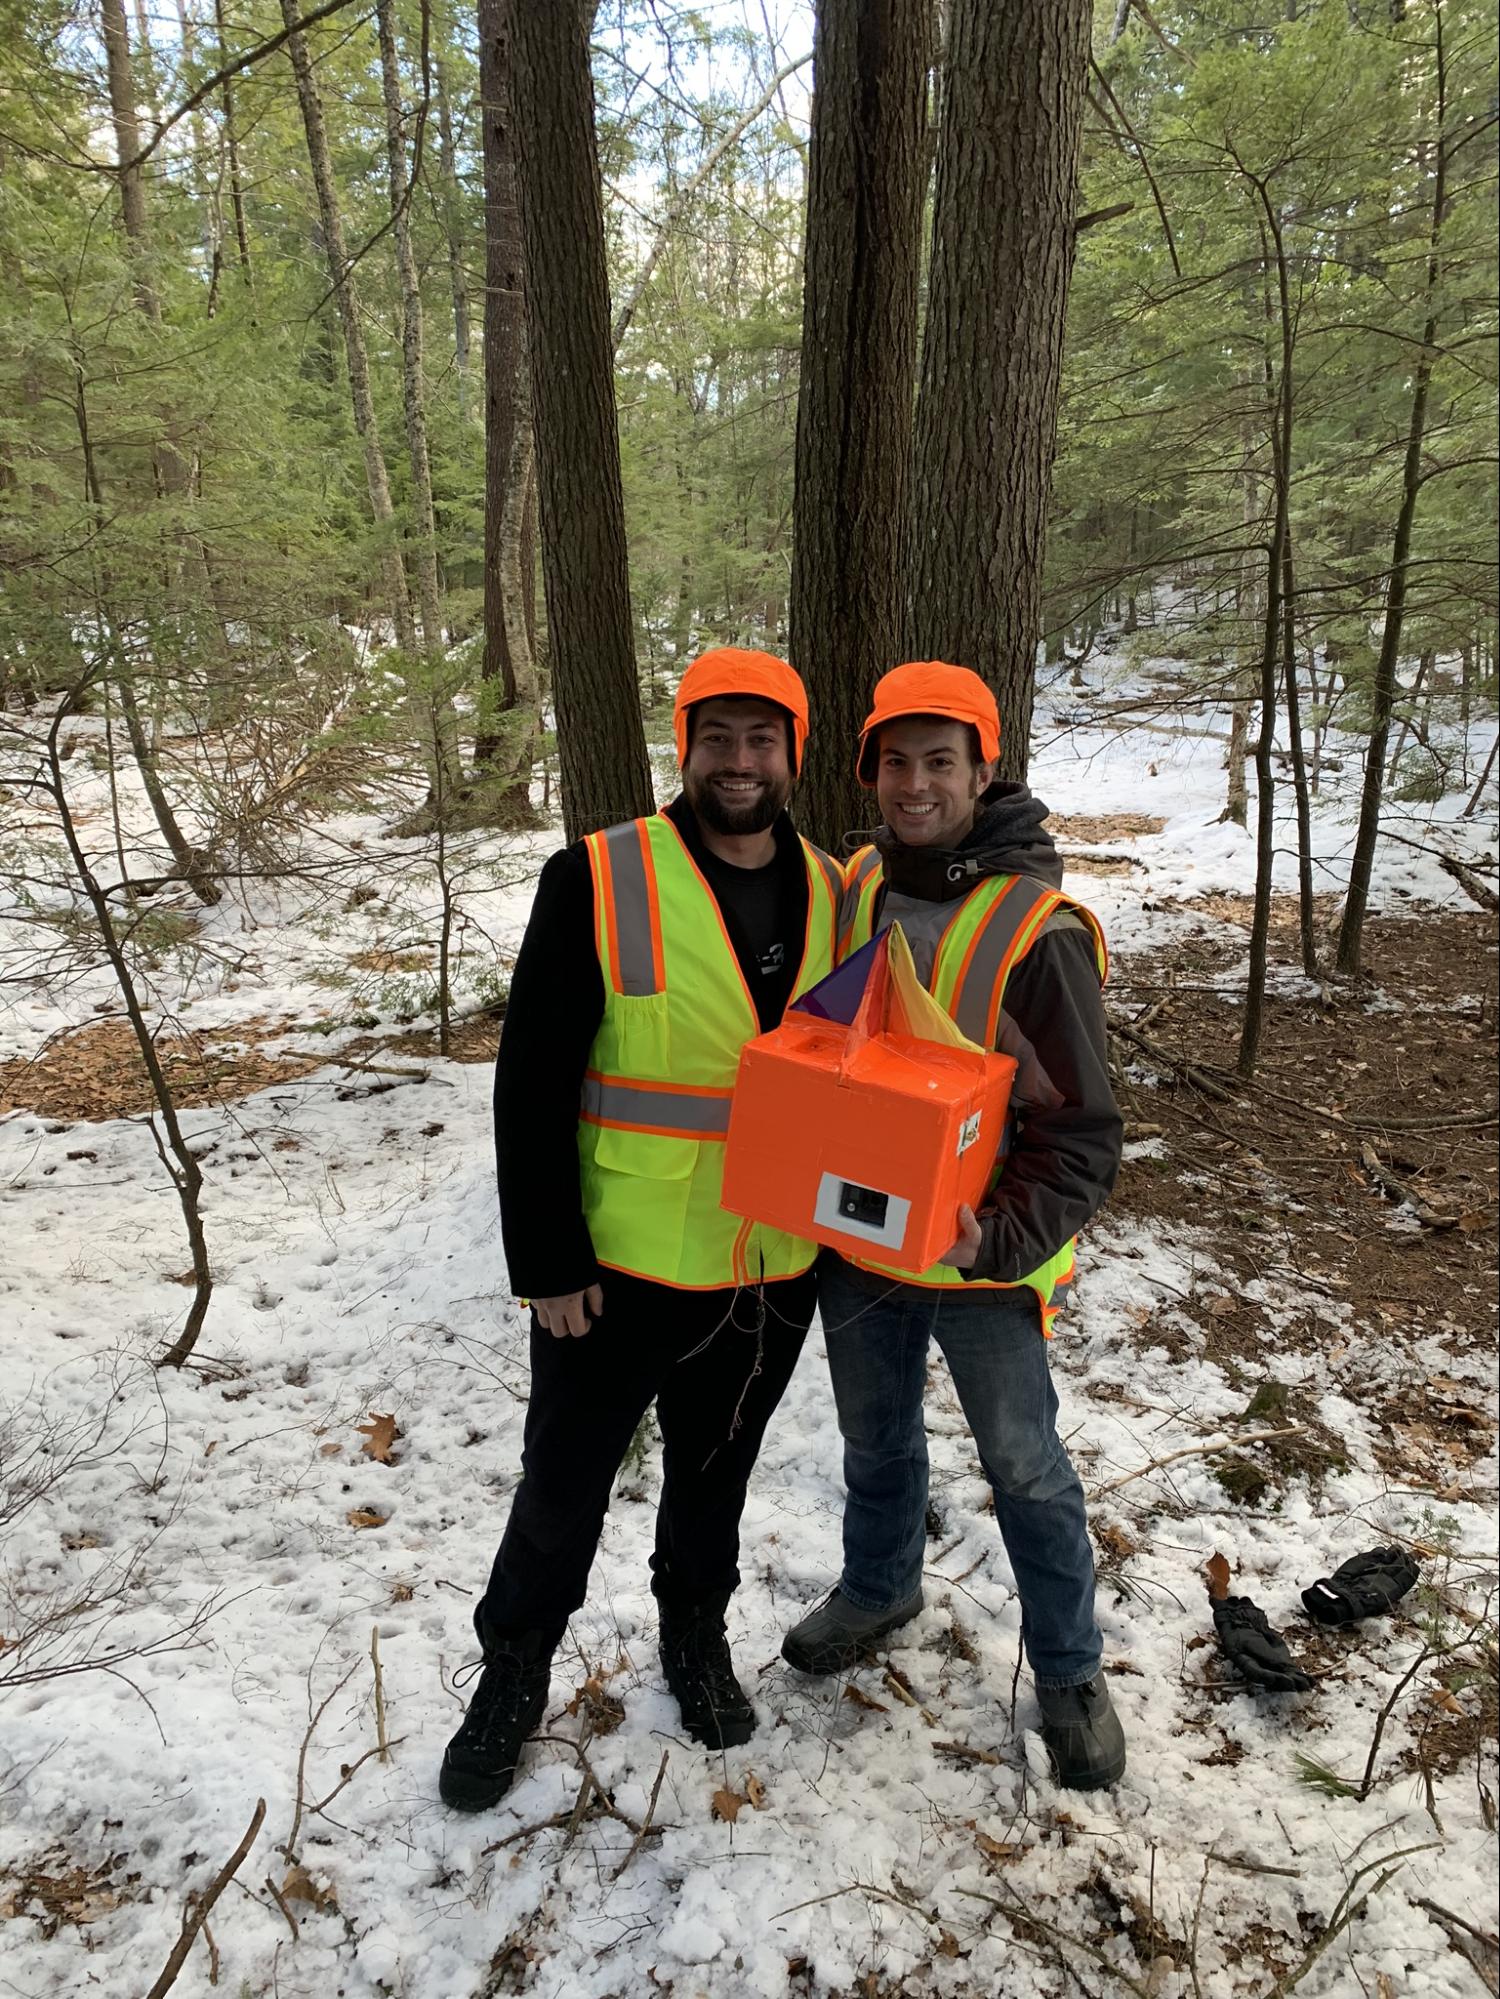
With a few timely calls and some more luck, we were able to get the owner of a local tree company out on site with one of his climbers and gear. After watching the tree climber make his way up the tree, it is apparent we had no chance of retrieving the payload ourselves. Finally, after more than 24 hours since our initial launch, we had the payload back in our hands and it was time to head home and unbox our equipment.
The Data
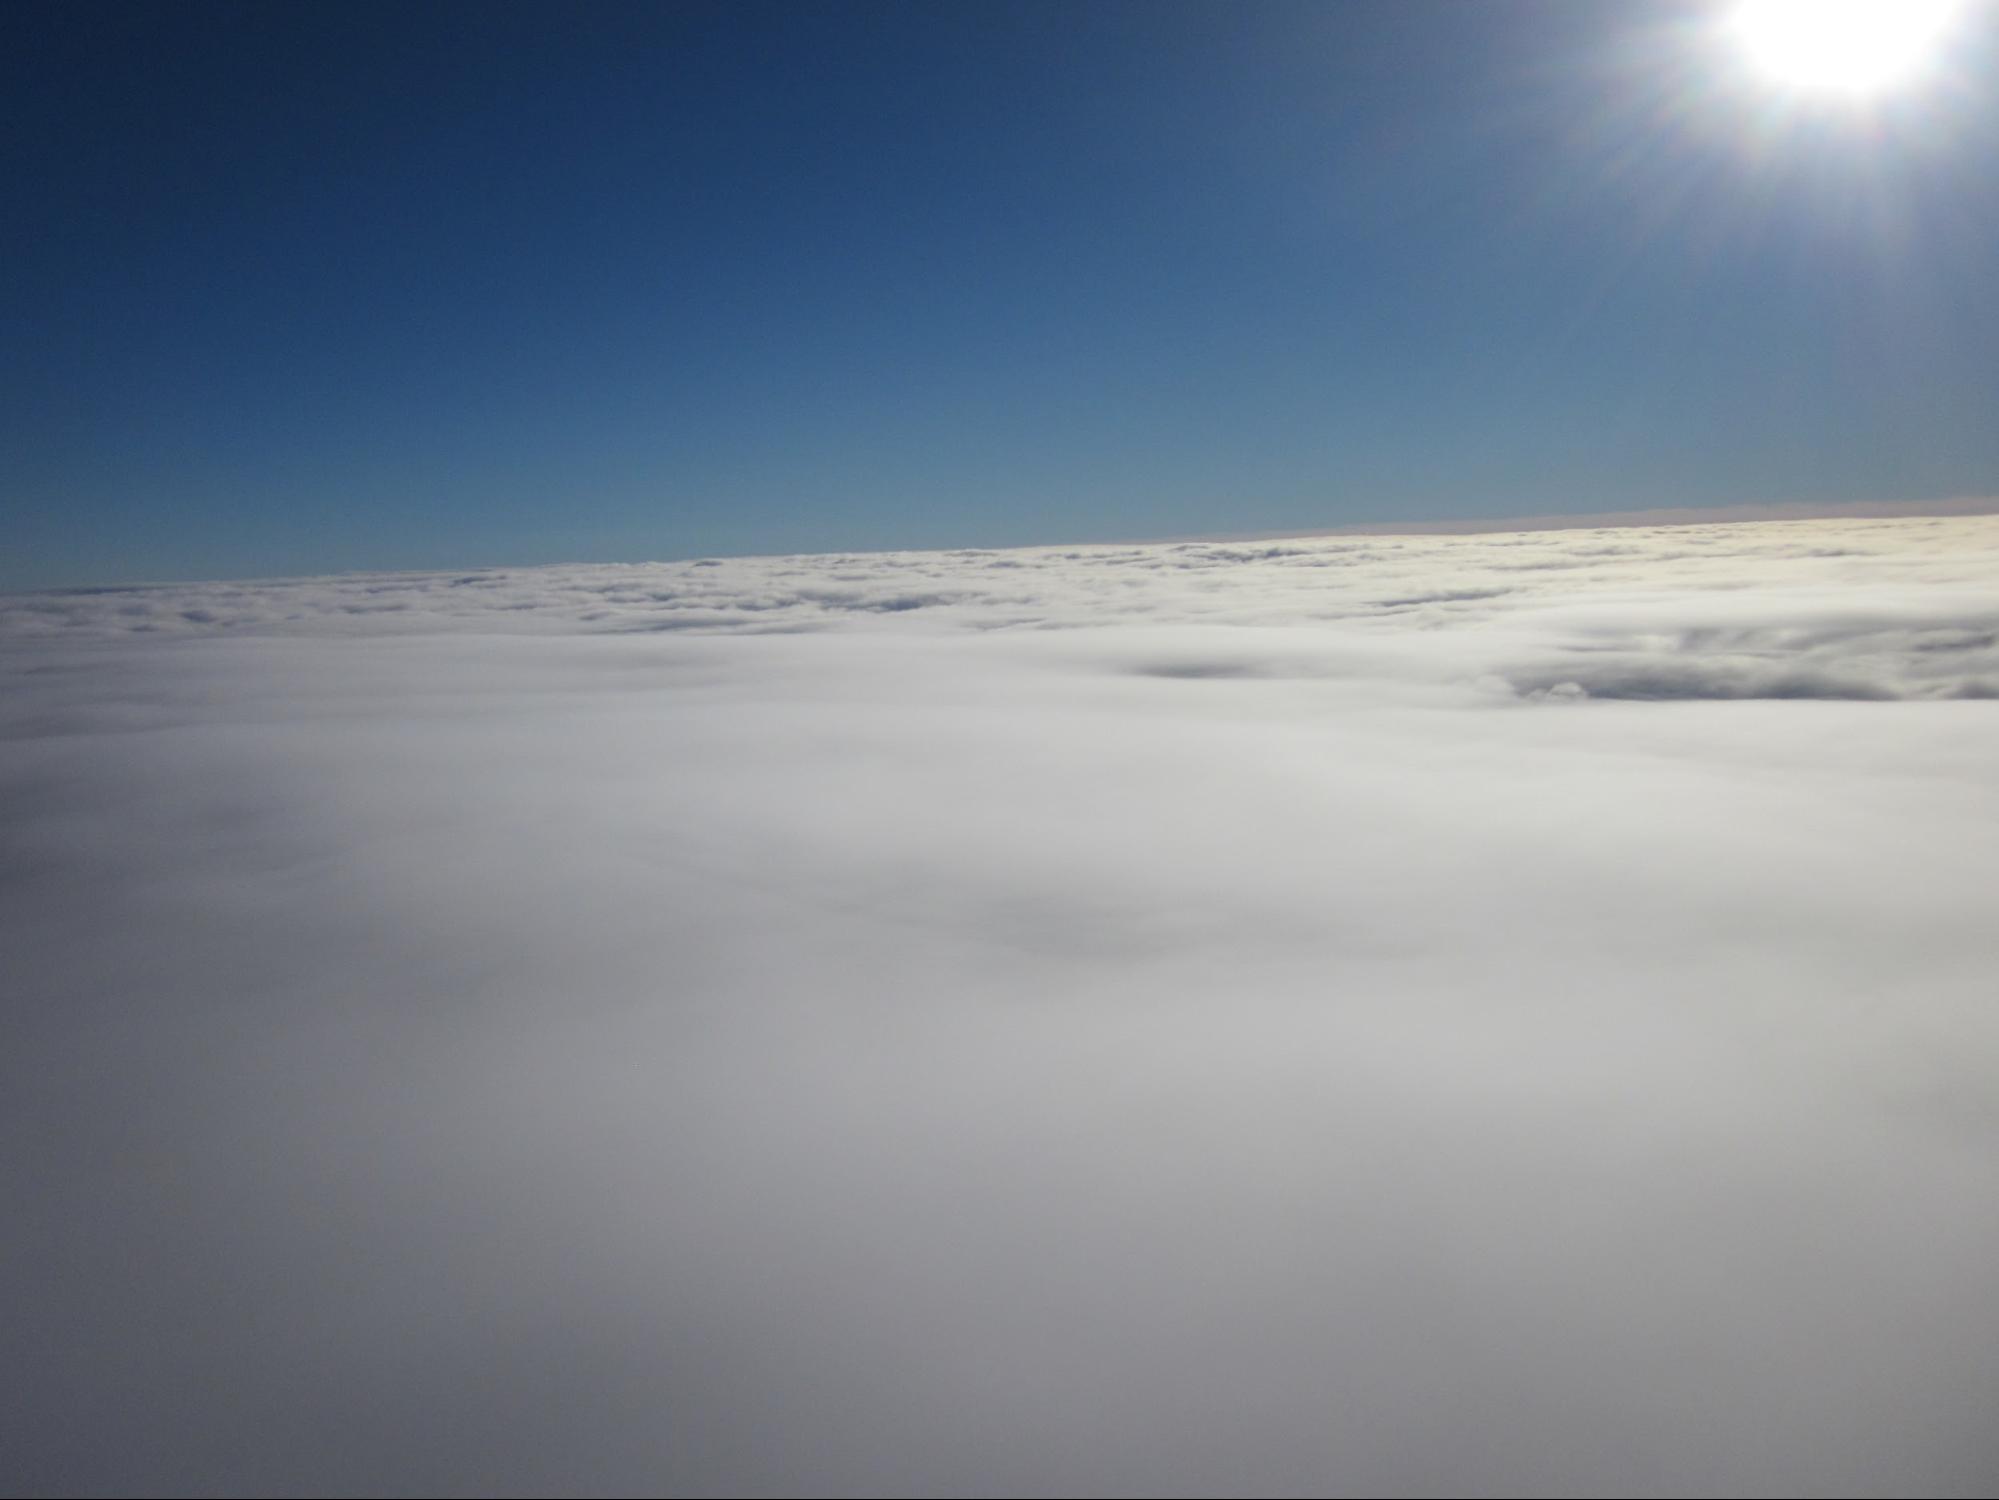
Unfortunately, due to the launch complications and the delay between assembling the payload and the actual launch, all photo/video devices lasted no longer than 1 and half hours into the flight. It was overcast the day of the launch, so there was a period of flight where the cameras are in the clouds and everything is white out. However coming out over the clouds gave us an image of a slice of heaven.
And so the success of this endeavor cannot be understated. With everything that went wrong, it is astonishing in the end we were able to capture over 5 hours of muon detection time as it traveled 364 miles from upstate New York to east coast Maine and to a maximum altitude of 62,703ft.
The graph below shows the detection rate of both the master and slave devices as the payload climbs and descends. It is evident from viewing the data that there is a direct correlation between altitude and the rate of detection of the muon detectors.
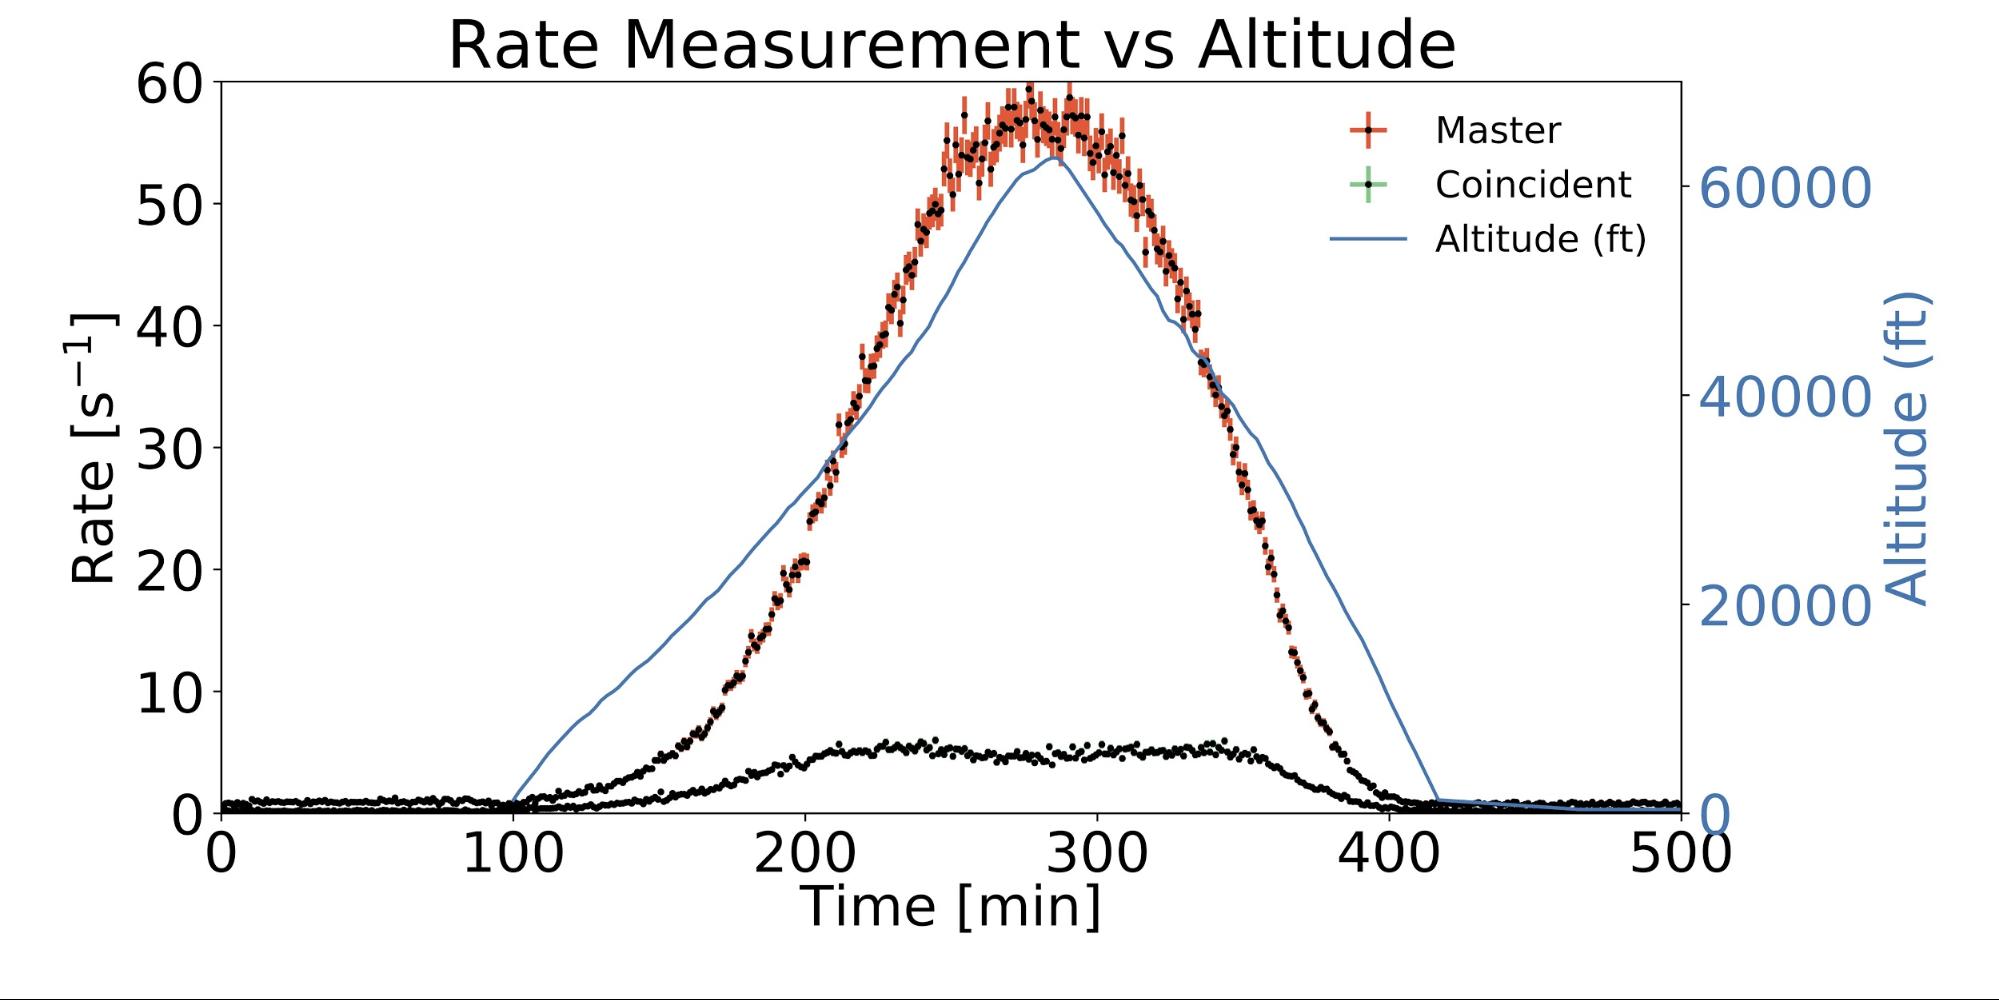
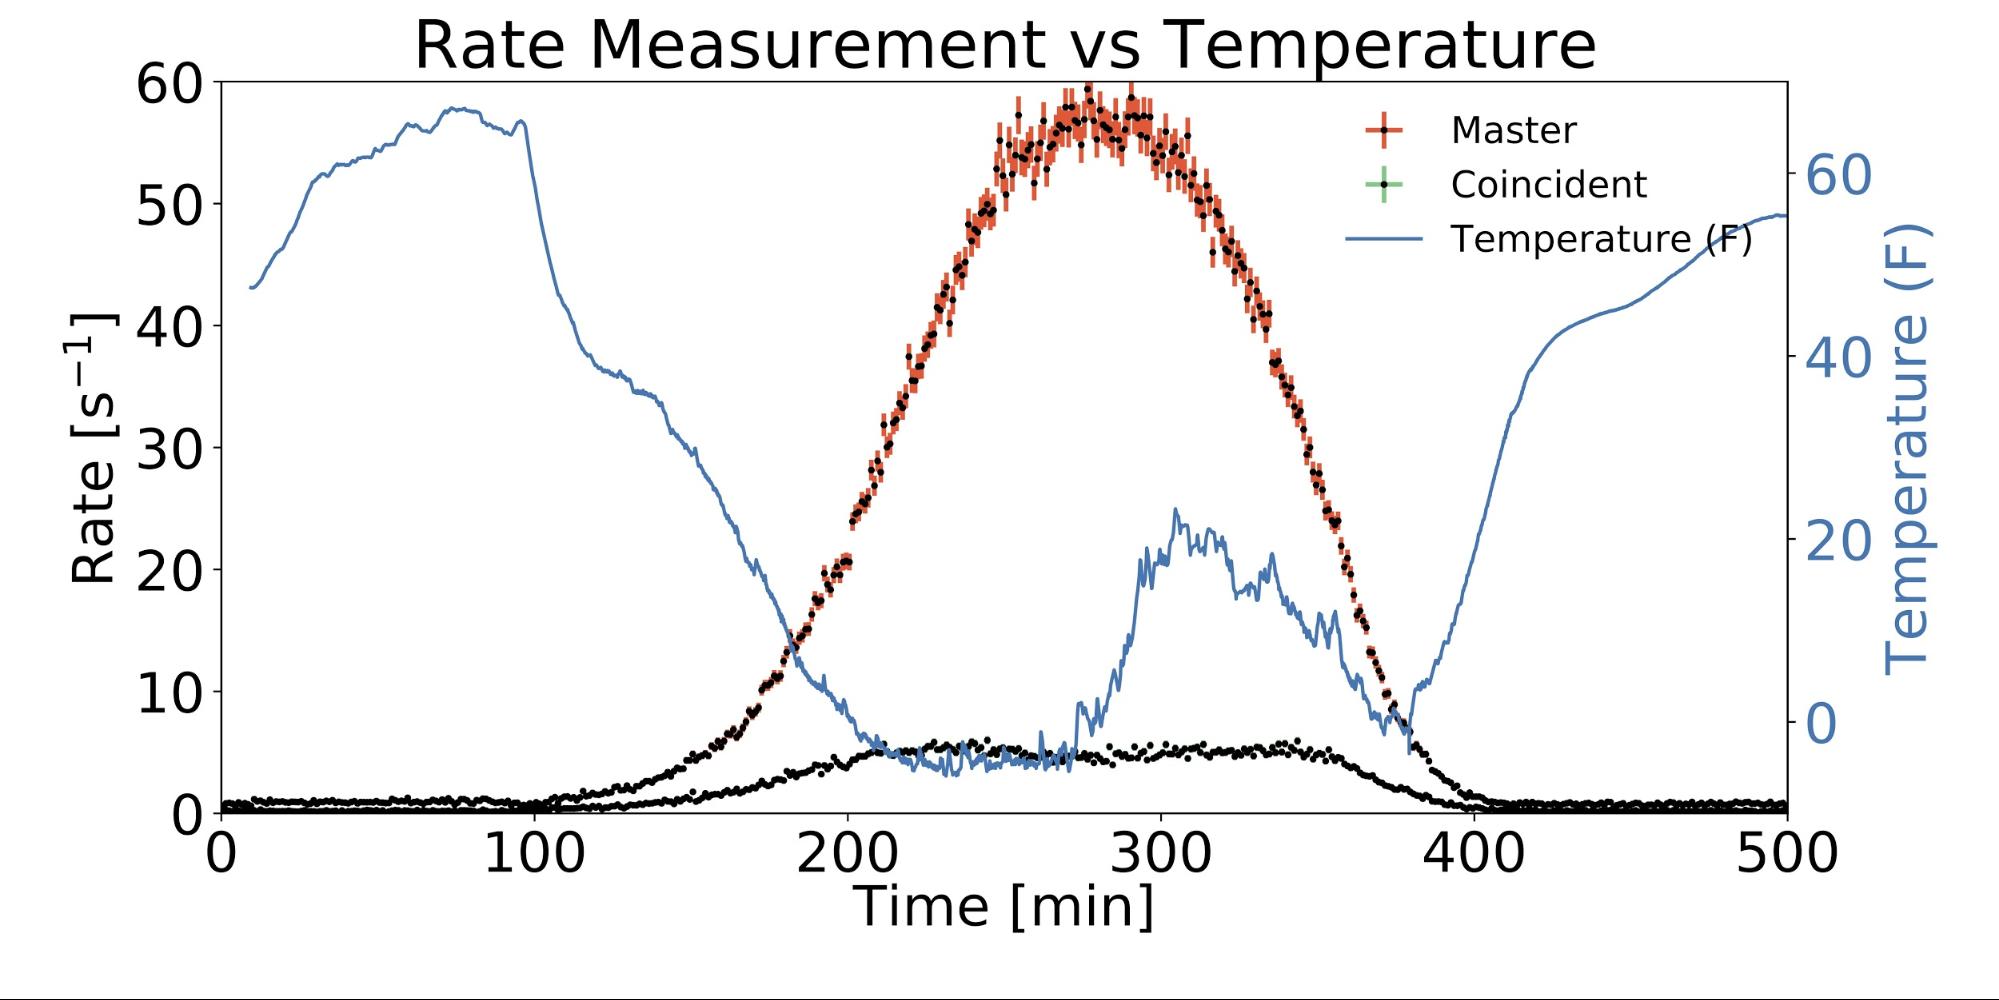
The CosmicWatch and scientific paper provide a very thorough explanation for the drop in detections (notice the plateau of the coincident device.) Essentially it comes down to the angle of incidence as the cosmic rays interact with particles in the atmosphere. At higher altitudes, it is less likely to interact with vertically down-going particles. The data captured by the pair of muon detectors sent up in our HAB confirms this theory.
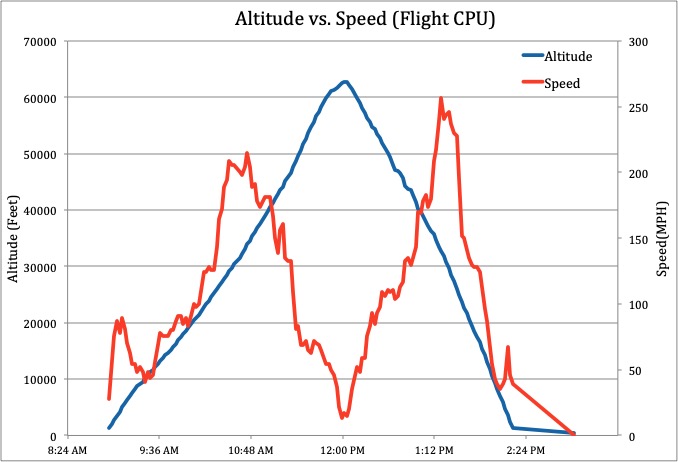
Using data from the other onboard electronics, the following graph shows the speed of the HAB relative to its altitude and time of flight. During the descent, the payload crossed back into the North East jet stream and reached speeds of excess 250 miles per hour.
Results/Conclusions
The results of this scientific endeavor have accomplished two things: in the primary it has provided a new dataset that had previously been difficult to acquire by successfully mapping muon detections rates up to an altitude of 60,000ft for a period of 5 hours. The data set verified the expected theory concerning cosmic rays, and that is always reassuring.
The second accomplishment has been this project’s ability to demonstrate the new progression of small science. From the internet where this was discovered and disseminated as an open source project, to the basement of a house where the electronics where soldered and SMT components reflowed in an Infrared oven; to the acrylic enclosure and PCBs machined over in China; and the Scintillator purchased on eBay; the barrier of entry for what used to be a complex science experiment has greatly been lowered in the 21st century.
If scientific curiosity can be nourished, the expansion of small science can be leveraged to fulfill scientific endeavors that current efforts fail to accomplish. The future of scientific endeavors is too important to wager on the success of multi-billion dollar, decade-long experiments. To quote Dr. Leon Lederman: ‘“Small Science” has also been a source of discovery, variety, and innovation, which contributes enormously to the advancement of knowledge. We must strike the proper balance in our science policy and be prayerfully grateful that both options exist.’